
Cue Points
Once you load a track into the music player, you can add or delete cue points.
You can right click a cue point to set a color, name and change it to a loop.
If you enabled Rekordbox memory cues in the Lexicon settings, each cue also shows an M that you can click to make it a memory cue in Rekordbox. See Syncing to Rekordbox.
Delete a cue point by right clicking it or by CTRL/CMD clicking it.
Hover over a cue button to see where that cue is: the overview waveform lights up from that cue to the next one. For a loop, the loop itself lights up. You can turn this off for cues with Highlight hovered cue on overview in the settings under Music Player.
By default, the following hotkeys are available:
1: Set or play cue 1
2: Set or play cue 2
etc
CTRL/CMD+1: Delete cue 1
CTRL/CMD+2: Delete cue 2
etc
You can change these hotkeys in the settings.
Overview waveform
The overview waveform above the music player shows the whole track. Next to the waveform itself it shows:

- The playhead: the line where the track is playing.
- Cue points: a small triangle at the top in the color of the cue. Turn on
Overview cue bar numbersin the Lexicon settings to also see the bar number next to each cue. - Loops: a shaded area over the length of the loop. It is grey for a normal loop, red for an active loop and orange while the loop is playing.
- The hovered cue: hover over a cue button and the part of the track from that cue to the next one lights up in the cue's color (see above).
- Tempo changes: on a track whose tempo changes (see Beatgrid), a double arrow marks where the change starts (pointing up when the tempo goes up, down when it goes down), followed by a wavy line and a short line where the new tempo settles.
- Markers: the strip below the overview shows the time at every minute by default. You can change it to bar or beat markers, or turn it off, with
Overview markersin the Lexicon settings.
Click anywhere on the overview waveform to jump to that spot, or click and drag to scrub through the track.
Loops
You can turn any cue into a loop by right clicking it and setting the loop length in beats with the - and + buttons, or by typing a number. Loops are always made from a cue point: there is no separate loop button in the music player.
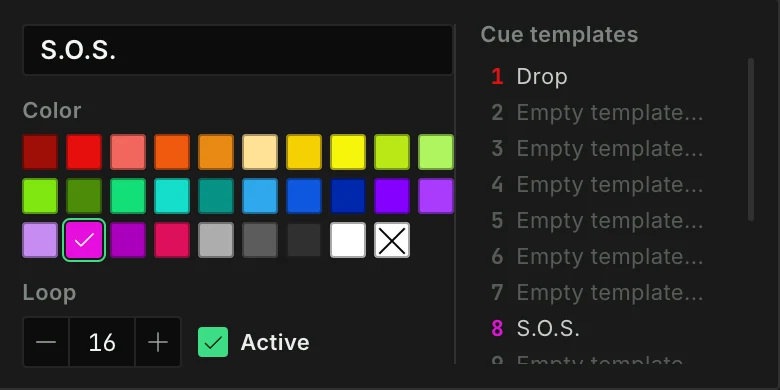
A loop can be turned into an active loop by enabling the Active checkbox. An active loop will automatically engage when the play head reaches it. Active loops are sent to DJ apps that support it. Only Rekordbox, Engine, VirtualDJ and Djay Pro support active loops.
When using Lexicon as a music player, it makes sense for active loops not to trigger automatically. You can turn off active loops globally in the music player in the top left of Lexicon. This only stops loops from starting automatically, your loops stay saved on the cues.
Leaving a loop
To get out of a loop that is playing, pause and play again, click somewhere else on the waveform, or jump to another cue. The loop itself stays saved on the cue.
Quantize
You can enable quantize to make your cue points snap to the beatgrid. Quantize can be enabled from the Edit menu, or by pressing the "Quantize" button in the music player.
The Q hotkey also toggles quantize by default.
Dragging Cues
You can drag cue points to re-arrange them.
Moving Cues
You can move a cue to a new position in the track by holding the SHIFT button and clicking a cue. The cue will be set at the current track position.
Cue Templates
You can set up cue templates so you don't need to enter the same name and color each time.
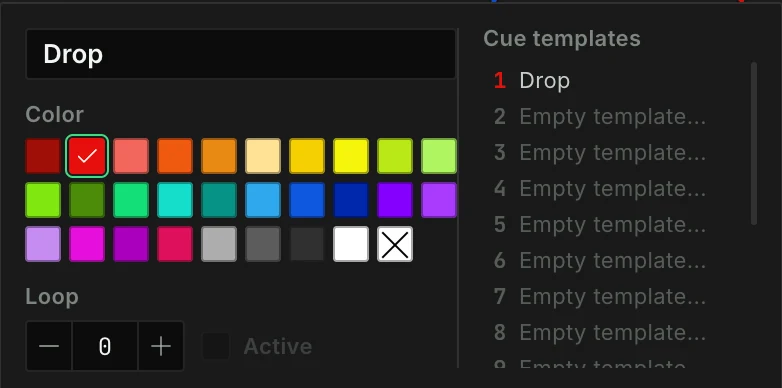
To create a cue template, first right click an existing cue in the music player. In the popup that opens, click the double arrow button (Cue templates) next to the name field to show your templates. Once you have templates, they are shown right away. Click any empty line to create a template from your current cue point.
To change a template, click the pencil (Edit template) on its row. The name, color and loop fields now edit that template instead of your cue, and every change is saved to the template. Click the check mark or press Escape to finish editing and go back to your cue.
To move a template to another slot, drag it there. If that slot already has a template, the two swap places. Nothing else moves, so your cue template hotkeys stay on the same slots.
To use a cue template, all you need to do is open the popup and click an existing cue template. That template will be applied to your current cue point. You can quickly do this by pressing the cue buttons (see the default keys above). Hotkeys are enabled for the first 8 cue templates.
You can add an unlimited number of cue templates. Once all your templates are full, a new empty template is created at the bottom.
To directly apply a cue template to a cue point, you can set up a hotkey for each cue template. If the music player is exactly on top of a cue point and you press the hotkey, that cue template will be applied to that cue point.