Import Library
Import Options
These options are available when you import a library from a DJ app.
Merge into current library
Merging allows you to merge multiple libraries from (different) DJ apps into Lexicon. When enabled, no tracks or playlists will be deleted. Tracks that already exist will be updated with the fields from the imported track.
Specific fields
Only available when the merge option is enabled.
This allows you to select the fields you want to import into your existing tracks. This is especially useful if you want to use a DJ app for only the beatgrid it generates, or any other field you are interested in. By default, all fields are selected.
Importing Your Rekordbox 6 or 7 Library
Lexicon has direct integration into the Rekordbox 6 and Rekordbox 7 database.
Importing is easy, follow these steps:
- Make sure Rekordbox is closed
- Open Lexicon
- Go to the
Syncpage and then clickImport tracks & playlists - Select
Rekordbox 6 / 7 - Leave the other settings at their default
- Click
Start importing - Start using Lexicon!
Options
Hot or memory cue
Rekordbox has both hot cues and memory cues. Lexicon only has cues by default, but you can enable memory cues in the Lexicon UI by enabling that DJ app specific feature in the Lexicon settings.
To send your cues to the memory cue bank in Rekordbox, choose Only memory cues or Both here.
To send your cues to the hot cue bank in Rekordbox, choose Only hot cues or Both here.
Importing Your Serato 3 or 4 Library
Lexicon has direct integration into the Serato database. Serato DJ Pro and Serato DJ Lite are both supported. Serato 3 and Serato 4 are both supported.
Importing is easy, follow these steps:
- Make sure Serato is closed
- Open Lexicon
- Go to the
Syncpage and then clickImport tracks & playlists - Select
Serato DJ - Leave the other settings at their default
- Click
Start importing - Start using Lexicon!
iTunes playlists
If you are using iTunes playlists inside Serato, then these will not be imported when importing from Serato. You can recreate the playlists in Serato and drag the tracks into each crate, or import directly from iTunes after importing from Serato. Make sure to keep the Merge option enabled.
Serato Options
Streaming Service
Serato only supports one enabled streaming service at the same time. So if you use a streaming service (Beatport, Tidal, etc), make sure it is enabled in the Serato settings. If it is not enabled, Lexicon will not import those streaming tracks from Serato.
Tracks in parent crates/folders
Serato lets you drag tracks into a "parent" crate, like the one highlighted below.
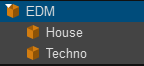
Lexicon does not support tracks inside a parent folder so during import Lexicon will create special playlists called _FolderTracks containing the parent crate tracks.
Why doesn't Lexicon support tracks inside a parent folder? Because it is a bad organizational practice. Your parent folder would become an unorganized mess and it's impossible to know which tracks belong there and which belong in a sub-playlist. It's always better to create a new playlist, even if you're going to use it as a messy/unorganized playlist on purpose.
Importing Your Engine DJ Library
Lexicon has direct integration into the Engine DJ database.
Importing is easy, follow these steps:
- Make sure Engine DJ is closed
- Open Lexicon
- Go to the
Syncpage and then clickImport tracks & playlists - Select
Engine DJ - Choose if you want to import your Playlists or Crates from Engine DJ
- Leave the other settings at their default
- Click
Start importing - Start using Lexicon!
Engine DJ Options
Source drive
This is the same option as Target drive on the Sync page, see this manual page.
Extra: Missing playlists
This is a troubleshooting option if you notice that not all your playlists are getting imported.
Importing Your Traktor Library
Lexicon has direct integration into the Traktor database. Lexicon supports Traktor Pro 3 & 4 but does not support Traktor DJ.
Importing is easy, follow these steps:
- Make sure Traktor is closed
- Open Lexicon
- Go to the
Syncpage and then clickImport tracks & playlists - Select
Traktor Pro - Lexicon should auto-detect your NML (database) file. If it does not, you can point Lexicon to it. Otherwise, you can export your Traktor library as NML by right clicking your collection.
- Leave the other settings at their default
- Click
Start importing - Start using Lexicon!
Importing Your VirtualDJ Library
Lexicon has direct integration into the VirtualDJ database.
Importing is easy, follow these steps:
- Make sure VirtualDJ is closed
- Open Lexicon
- Go to the
Syncpage and then clickImport tracks & playlists - Select
VirtualDJ - Leave the other settings at their default
- Click
Start importing - Start using Lexicon!
Tracks in folder playlists
Lexicon does not support tracks inside a parent folder so during import Lexicon will create special playlists called _FolderTracks containing the parent crate tracks.
Why doesn't Lexicon support tracks inside a parent folder? Because it is a bad organizational practice. Your parent folder would become an unorganized mess and it's impossible to know which tracks belong there and which belong in a sub-playlist. It's always better to create a new playlist, even if you're going to use it as a messy/unorganized playlist on purpose.
Importing Your Rekordbox 5 Library
Lexicon does not have a direct connection to Rekordbox 5. To get your data out of Rekordbox, you need to export it as an XML file.
Follow these steps:
- Open Rekordbox
- Under the Advanced tab in the Rekordbox preferences, make sure the
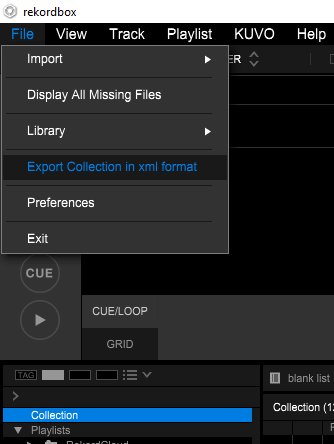
BPM change pointsoption is enabled. - In the File menu, select
Export Collection in xml format
- Save your collection XML anywhere you want

- Open Lexicon
- Go to the
Syncpage and then clickImport tracks & playlists - Choose
Rekordbox 5 - Leave the other options at their defaults
- Click
Start importing - Start using Lexicon!
Importing Your Apple Music / iTunes Library
Lexicon can import XML files exported from iTunes. These XML files contain your tracks and playlists.
Follow these steps:
- Open Apple Music / iTunes
- Go to File ➡ Library ➡ Export Library
- Save the XML file
- Open Lexicon
- Go to the
Syncpage and then clickImport tracks & playlists - Select
iTunes - Point Lexicon to the earlier created XML file
- Leave the other settings at their default
- Click
Start importing - Start using Lexicon!
Playlist import
You can create an XML with only selected playlists and import it in iTunes by choosing Import Playlist in the menu. But this only imports the playlist and not the tracks inside the XML. So your track tags will not update if you import a playlist in this way.
To update your track tags in iTunes, you always have to do the above steps with an XML generated by a Full Sync.
Import from Pioneer USB (OneLibrary)
You can import from a Pioneer / AlphaTheta USB drive. This will import all your playlists, cues, beatgrids, etc.
Music Files
Lexicon will attempt to match the music files on your USB drive with the files in your Lexicon library. If the files already exist, it will not copy them and just update their metadata.
If there is no matching file found in your Lexicon, it will copy the file from USB into the Music/Lexicon folder with your USB name as subfolder.
Importing M3U playlist files
You can also import m3u(8) playlist files into Lexicon. These are standard playlist files supported by most music players.
All tracks inside the playlist files will be checked and imported if needed.
There are two ways to import them.
Dragging
You can drag one or more m3u(8) files over the playlists panel and Lexicon will import them all as playlists.
Import page
You can also import m3u(8) files from the Import page. Select Playlist (M3U) from the dropdown and choose one or more m3u(8) files to import.
Export as M3U
You can save your tracks as M3U files by right clicking one or more playlists ➡ Share ➡ Save to file. However, keep in mind this is not the recommended way to send your playlists to a DJ app, use the Sync screen for that instead.
Sync Library
Sync
Syncing your library lets you copy all your Lexicon tracks and playlists into your favorite DJ app.
Syncing is very easy. Go to the Sync page from the sidebar menu and choose the DJ app you want to sync to. Most DJ apps require no extra work.
For Rekordbox, please refer to the Rekordbox page in the manual.
Conversion
Sync is also what you use when converting your library. See Convert Library in the manual.
Full or Playlist or Modified
You can perform a Full Sync, a Playlist Sync or a Modified Sync. With a Full Sync, any track that does not exist in Lexicon will be removed from your DJ app. A Full Sync makes it so that your DJ app is the same as Lexicon.
Rekordbox XML (not Rekordbox 6/7 Direct) is the exception to this rule because of the extra XML import step. Rekordbox does not delete anything when importing.
With a Playlist Sync, your existing library in your DJ app is preserved and tracks and playlists are only added or updated. Nothing is removed.
A Modified Sync is similar to Playlist Sync but instead of choosing a playlist, Lexicon will automatically pick the playlists and tracks that were changed since your last sync. Modified Sync becomes available after your first Full or Playlist sync. Modified Sync is tracked per DJ app.
Field Mappings
To get your specialized fields like Energy or your Tags from Lexicon into your DJ app, you have to use field mappings. See the Field Mappings page in the manual.
Key Conversion
See the Key Conversion manual page.
Don't Touch My Grids
When this option is enabled, Lexicon will not change your existing beatgrids in your DJ app. Enable this if you have sensitive beatgrids that are never allowed to change. New tracks that don't exist in your DJ app yet will still get the beatgrid from Lexicon, even when this option is enabled.
Colors
Lexicon has many more colors than the DJ apps. You can tell Lexicon to change your colors to the nearest matching color when syncing. For example, if the DJ app you've chosen does not support the color orange, then all your orange colors from Lexicon will be changed to red in the DJ app.
Leaving the option off will set no color if the DJ app has no directly matching color.
Excluded From Sync
Any playlist, smartlist or playlist folder that starts with "Excluded From Sync" will be skipped when syncing to any DJ app. You can also create a Custom Tag called "Excluded From Sync" and assign it to any track so these tracks do not get synced.
Syncing Lexicon to Rekordbox
Tips
It's best to turn off auto analysis in the Rekordbox settings so that your beatgrids won't get overridden.
To add waveform data without overriding your existing beatgrid, analyze tracks with only Phrase selected. Lexicon changes your Rekordbox analysis settings to only Phrase on sync.
If BPM/Grid is greyed out and can't be deselected, check inside the Rekordbox settings and change the analysis setting there.
Official or Unofficial?
There are two methods to sync to Rekordbox. The official method uses an XML file that Rekordbox can read. This method has several big limitations (see further below) and is very slow.
The unofficial method writes directly to your Rekordbox database. This solves all limitations and is much faster. This is the recommended method if you use Rekordbox 6 or 7. Should you experience issues (please report them!), you can fall back to the official XML method.
Rekordbox 5 can only use the official XML method.
Album Art
To display album art in Rekordbox, you need to reload tags, that will also reload the album art. Right click your tracks in Rekordbox ➡ Reload Tags. This reloads all file tags (title, artist, comment, etc) so if you notice old info coming in after a reload, your ID3 tags have that old info. To update that, go to Lexicon and right click your tracks ➡ Write Tags.
Note: WAV files officially do not support album art and that is why Rekordbox does not show any album art for those files. Unofficially WAV can support album art which is why in some music players or DJ software you can use album art on WAV files. Rekordbox does not use this unofficial way.
Rekordbox 6 and Rekordbox 7
For Rekordbox 6 or 7, use the method without the XML instead. You don't need to do anything with the XML file if you are using Rekordbox 6 or 7.
You can add waveforms to your tracks in Rekordbox without overwriting your beatgrids. Uncheck the beatgrid in the analysis window and check Phrase, so Rekordbox will analyze without setting a new beatgrid.
Closing Rekordbox
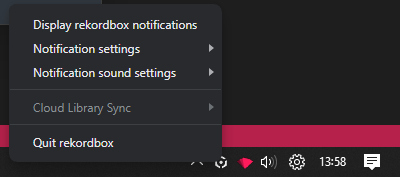
Make sure Rekordbox is closed before syncing. Lexicon will not sync unless Rekordbox is fully closed. Rekordbox does not close immediately, give it some time. Make sure you've also closed Rekordbox in the tray:
Sometimes Rekordbox is closed but Lexicon still says that Rekordbox needs to be closed. In this case, either the rekordbox or the rekordboxAgent process is still running in the background. Once those processes don't appear to do anything (zero CPU usage), you can use
Task Manager or Activity Monitor to end these processes.
Do not end the Rekordbox process if it is still using CPU because you may damage your database file. Larger Rekordbox libraries will take (much) longer to shut down.
Rekordbox 5
Rekordbox 5 is harder because it requires you to go through the XML import process. Step by step instructions are provided below. It is highly recommended to use Rekordbox 5.6.0 if you want to keep using Rekordbox 5, see below.
The infamous Rekordbox XML bug
There is a long standing Rekordbox bug in the XML import process. This bug does not prevent us from importing, but it does make it a bit more involved. The short version is: You have to right click your tracks and not just the playlists to import them. If you only import playlists, it will not update any track that already exists.
This bug exists in Rekordbox 5, 6 and 7. If you are on Rekordbox 5, the advice is to use version 5.6.0 which is the last version without this bug.
You can still download Rekordbox 5.6.0 for Windows and macOS.
If you are using Rekordbox 6 or 7, you can use the XML method described on this page but it is not recommended. Use the Rekordbox 6/7 Direct method instead that skips the XML.
Step by step for Rekordbox 5
First we have to set the Rekordbox XML location in the advanced preferences menu. Only after that will the XML menu appear.
- Open Lexicon
- Go to the
Syncpage - Choose
Rekordbox - Click
Save - Lexicon creates an XML file. Save the XML file on your computer.
- Open Rekordbox
- Make sure the Rekordbox XML location is set to the XML file you downloaded earlier. If you always save the XML file in the same location, you won't need to change this setting again.
- Open the Rekordbox preferences in the File menu
- Go to the Advanced tab and set the Imported Library location to the XML file you just downloaded.
- Make sure that "Rekordbox xml" is checked on the View tab under Layout.
- Close the preferences menu and restart Rekordbox.
- You will now see the new rekordbox xml option in the menu. Your downloaded XML should already be loaded but if it isn't, just press the tiny Reload button. If you don't see the XML tab, make sure you restarted Rekordbox.
- The easiest thing you can do now is to right click your top most playlist called Playlists and click Import Playlist. This imports all playlists and all tracks inside any of your playlists. If you have tracks that aren't in any playlist then you may need to import the entire collection too. Importing the entire collection may take a while so it might be faster to only import specific playlists. Keep the earlier mentioned Rekordbox bug in mind.
Options
These options are available for both Rekordbox 5, 6 and 7.
Cue Destination
Rekordbox is the only DJ app that has memory cues. Lexicon does the same as every other DJ app, there are only hot cues. To make sure you don't lose your memory cues from Rekordbox, you can choose a Cue Destination. Setting the cue destination to "Both" will import both your hot cues and your memory cues. Memory cues will be merged into hot cues in Lexicon. Any duplicate cues resulting from this merge will be hidden, but not deleted. When syncing your Lexicon library back to Rekordbox, select "Default" as cue destination and those hidden memory cues are converted back to your old memory cues in the same position. Any cues added in Lexicon will only be available as hot cues.
You can also choose "Only hot cues" or "Only memory cues" during import to only import those and ignore the rest.
During sync, you have the additional options "All to hot cue", "All to memory cue" and "All to hot and memory cue". Choosing one of these copies all your cues into either of these or into both. So if you want to copy your hot cues to memory cues, you can simply choose both here.
Memory Cues in Lexicon
You can create specific cues in Lexicon that will become memory cues in Rekordbox. To do that, you first need to turn on the DJ app specific feature in the Lexicon settings. When done, your cues will display an M next to them. Click it will highlight it and indicate it will become a memory cue in Rekordbox.

The above Cue Destination setting still applies, so setting it to "All to hot cue" will still only send hot cues to Rekordbox. If you want to get both hot- and memory cues in Rekordbox, you need to set the Cue Destination to "Default".
Limitations
Album Art for WAV files
Rekordbox does not support album art for WAV files, even reloading tags will not show them.
Active Loops
Rekordbox only support one active hot loop and one active memory loop. Having multiple active loops in Lexicon will drop all active loops after the first when syncing to Rekordbox.
XML limitations
Tags are not exported because the XML does not support MyTags. Smartlists are not exported because the XML does not support them. Memory cue colors are not exported because the XML does not support them. Tracks removed from Lexicon are not removed from Rekordbox because the XML only supports adding and updating tracks. Active loops are not preserved because the XML does not support them.
MyTag limitations
When using the Rekordbox Direct sync method
There is a maximum of 4 MyTag categories. If you have 4 or less tag categories in Lexicon, you won't notice anything. If you have more than 4 tag categories, your tags will all be merged into one "Lexicon Tags" MyTag category.
There is a maximum of 128 MyTags.
Rekordbox Sync Manager incompatibility
When using the Rekordbox Direct sync method
There are still a few unknowns in Rekordbox causing the Sync Manager to misbehave when syncing to USB, causing duplicate tracks or not updating changed fields on your tracks. Instead of using the Sync Manager, it is recommended to right click a playlist in Rekordbox and export to USB from there.
Rekordbox Cloud Sync
Lexicon now supports Rekordbox Cloud Sync, but it is impossible to fully guarantee that Rekordbox will not create duplicates so it is recommended to disable it. You can also use the official XML sync method since Lexicon does not touch the Rekordbox database so there is no way for Lexicon to change anything.
If you want to disable Cloud Sync, you can read how to do that here. Alternatively, you can use the XML sync method. It is slower and less capable but it is the official way created by Pioneer so it should fully work with Cloud Sync.
Linked tracks
Tracks that are linked to each other in Rekordbox should be maintained when syncing to Rekordbox. However, there is no such feature in Lexicon currently and this information does not transfer to any other DJ app.
Syncing Lexicon to Engine DJ
You can sync your library to the Engine DJ desktop program or directly to a USB or hard drive in your Denon hardware, such as a Prime or SC6000.
Options
Target drive
There are several target drives you can sync your Lexicon library to.
(Computer) Engine DJ desktop
The default target is your computer. This will sync your library with the Engine DJ desktop software. After this sync, you can use Engine DJ to create a USB or send your tracks to a hardware device.
(Device/USB)
This target is any USB device or Denon hardware that is connected to your computer. For Denon hardware to appear here, you must connect it by USB and put the device in "Computer Mode".
The device or USB must be formatted as an (ex)FAT filesystem for it to appear here. This filesystem is compatible with Denon hardware.
When syncing to a hardware device, Lexicon will also copy your music to the device. It does this in the same way as the Engine DJ desktop software, so your device will be ready for use after the sync. You don't need to use the Engine DJ desktop software if you sync with this method.
Dropbox
If you have Dropbox installed, it will appear as a target drive. This works the same as the Device/USB. Lexicon will create the database there and copy the files. You can connect your Denon device to your Dropbox account and play directly from there.
Beatgrid locks
Beatgrids can be locked to help you manage how Engine responds to new tracks. You have the following options:
Default
Grids are locked if they were already locked when imported from Engine. If there is no previous Engine lock information, the grid is locked if there is a beatgrid (analyzed). The grid is unlocked if there is no beatgrid. This prevents Engine from overwriting Lexicon grids but still allows Engine to analyze grids for tracks that have no grid.
Lock all
All tracks that are exported have their grids locked.
Unlock all
All tracks that are exported have their grids unlocked
Album art
You can let Lexicon write your album art to Engine DJ. Since Lexicon needs to read all your music files, this will take extra time.
This option is especially useful when you sync directly to a USB or Denon hardware, since there is no way to reload album art on Denon hardware.
When you disable this option, Lexicon will keep existing album art in Engine DJ intact. So if you are only updating existing tracks (without changing album art), it's best to keep this option off for a faster sync.
Compatibility
Engine DJ has a feature called Remote Library, this is not supported by Lexicon currently. Tracks that you send to Engine DJ will not be playable through Remote Library on Denon hardware. The suggested approach is to sync your Lexicon library directly to your Denon hardware or a USB drive using the Target Drive option above.
Syncing Lexicon to VirtualDJ
VirtualDJ Settings
VirtualDJ automatically reads your music files' ID3 tags. If they don't match what Lexicon synced to VirtualDJ, you may be seeing things change when a track is loaded or analyzed in VirtualDJ.
To prevent that, you should turn off these settings:
Playlists
Your normal playlists can be found under Lists & Advice ➡ Playlists.
If you had previously imported from Virtual Folders (which serve the same purpose as playlists), you will not find them there anymore after a sync from Lexicon. Playlists are always sent to Lists & Advice.
Smartlists
Smartlists are converted to VirtualDJs equivalent called Filter Folders. You will find these under Filters in the VirtualDJ menu on the left.
If you want your smartlists to be in the same tree as your normal playlists, you can enable the Move smartlists option. When enabled, Lexicon will not create any Filter Folders anymore but instead turn all your smartlists into normal playlists in VirtualDJ.
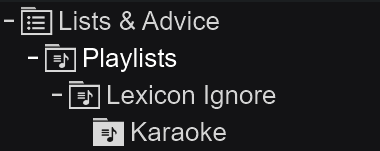
Ignore Folder (for Karaoke files and more)
You can create a playlist folder in VirtualDJ with the special name "Lexicon Ignore". This folder will not be removed when performing a full sync from Lexicon to VirtualDJ. This folder is useful if you want to keep non-audio files in VirtualDJ since Lexicon does not allow non-audio files in the library. Normally, anything not in Lexicon will be removed in VirtualDJ on full sync. The exception is this ignore folder.
One use-case for the ignore folder is karaoke zip files.
The folder should look like this:
Syncing Lexicon to Djay Pro
Djay Pro is fully supported in Lexicon.
iOS / iCloud support
If you want your tracks to sync automatically between your Mac and your iOS, you need to go through an extra step.
For iOS support, it is important that you add tracks to Djay Pro on your Mac first and then import these tracks into Lexicon. After this, syncing your tracks to Djay will work with iCloud and iOS. Dragging tracks into Djay and then also dragging them into Lexicon works too. It's just important that the tracks in Djay first appear through an official method such as dragging in.
If you add tracks to Lexicon and sync them to Djay without having already added them manually, they will still work in Djay but may not automatically sync to iOS.
The tracks should appear on your iOS device in the Djay app when adding files and changes like new cues on iOS should appear immediately on your Mac.
Limitations
Djay only supports two loops and one active loop. Any active loop you have will always be put in your first loop slot in Djay. Make sure to enable the active loop setting in Djay to enable it. In the preferences go to Song Loading and check Activate Saved Loop 1.
Any loops beyond the first two will be dropped on sync.
The smartlist field Release Date is not supported. Djay can use multiple OR operators in a smartlist, this is not supported when importing into Lexicon. Only one OR is supported.
Syncing your Lexicon library to Apple Music / iTunes
You can sync your tracks and playlists back to iTunes by using the iTunes XML that Lexicon creates.
There is one important step you have to take before syncing, which is to update your music file ID3 tags. You can do that like this:
- Select all your tracks
- Right click
- Write tags
This is needed because iTunes reads the file ID3 tags even if the track info is in the XML.
To sync your tracks and playlists to iTunes, go to the Sync page in the left sidebar and choose iTunes. You will see instructions to delete your iTunes library file and create an empty iTunes library. Follow the instructions carefully. This is important because if you don't do this, iTunes will duplicate all your playlists when importing the XML file.
Reloading tags in Apple Music / iTunes
iTunes doesn't provide a way to reload ID3 tags, but there are some tricks to force iTunes to reload ID3 tags anyway. See this page for the different methods.
Sync to Pioneer USB drives (OneLibrary)
Lexicon can sync your music and playlists to Pioneer / AlphaTheta compatible USB drives, the same that Rekordbox creates.
Lexicon supports both the new OneLibrary database and the old DeviceLibrary on the same USB drive. That means it will work on the newer devices like a CDJ3000 or XDJ-AZ and also on the older devices like a CDJ2000, CDJ900, XDJ-XZ, etc.
Fair warning: Use at your own risk. Always carry a USB drive made by Rekordbox as your backup, no matter how many times a USB sync from Lexicon has worked. You don't want to risk it.
Target USB Drive
You need to select a USB drive to sync to. This drive needs to be FAT32, exFAT or HFS+. This is the same as what Rekordbox supports so if it works there, it will work here. It's best to initialize your USB drive in Rekordbox so it copies your user settings to the drive. If you want to change user/CDJ settings, you need to do it in Rekordbox.
Cue Destination
This is the same setting when syncing to Rekordbox and decides if your cues go to the hot cue bank, memory cue bank or both.
Clean up unused files
Check this setting and Lexicon will delete the music files from your USB that are not in the current sync. Not normally needed but useful if you want a lean USB or if your USB is filling up.
CDJ Compatibility
When syncing to a Pioneer USB drive, Lexicon can scan every audio file for issues that would cause playback failures on CDJ hardware. Pioneer CDJs are notoriously strict about what they accept - and the E-8305 "Unsupported File Format" error gives you zero information about what's wrong. Lexicon detects these issues by reading the binary file headers of each track during export, and for many common problems can automatically patch the file on the USB copy without re-encoding or any quality loss. Your original music files are never modified.
Issues detected and auto-fixed
These issues are automatically repaired on the USB copy. The original file on your computer is never touched.
| Issue | What it means | How Lexicon fixes it |
|---|---|---|
| WAV_EXTENSIBLE header (format tag 65534) | Common in Bandcamp downloads and ffmpeg exports. The WAV file uses an extended format flag that CDJs don't understand, even though the audio itself is standard stereo PCM. | Patches the format tag to standard PCM (1) - a tiny binary change, no re-encoding, zero quality loss. |
| 32-bit float WAV | Standard export format in Ableton, Logic, FL Studio, and Bitwig. No Pioneer CDJ supports 32-bit float audio. | Re-encodes to 24-bit PCM WAV. |
| Sample rate too high (above 48kHz, e.g. 96kHz) | Hi-res audio files that most CDJ models cannot play. | Resamples to 48kHz. |
| Sample rate too low (below 32kHz) | Low-quality files that trigger E-8305. | Resamples to 44.1kHz. |
| VBR MP3 missing Xing header | Variable bitrate MP3 without the header that CDJs need for accurate seeking and duration display. Causes tracks to jump to the wrong position when you seek. | Adds a proper Xing header. |
| Multichannel audio (more than 2 channels) | Surround sound or multi-track files. CDJs only support mono and stereo. | Downmixes to stereo. |
| AIFF-C (compressed AIFF) | A compressed variant of AIFF that no CDJ supports. | Converts to standard uncompressed AIFF. |
Issues detected and warned about
These issues cannot be automatically fixed - Lexicon flags them in the compatibility report so you can address them before your set.
| Issue | What it means | What you should do |
|---|---|---|
| OGG Vorbis (.ogg) | Not supported by any Pioneer CDJ. | Convert to WAV, AIFF, or MP3. |
| WMA (.wma) | Windows Media Audio - not supported by any CDJ. | Convert to WAV, AIFF, or MP3. |
| ALAC (Apple Lossless in .m4a) | Despite being lossless, Apple Lossless is not supported by any CDJ. | Convert to WAV, AIFF, or FLAC. |
| FLAC on older CDJ models | FLAC is only supported on CDJ-3000, CDJ-TOUR1, and CDJ-2000NXS2. Older models will reject it. | Convert to WAV or AIFF, or make sure you're playing on a compatible model. |
| DRM-protected AAC (.m4p) | Copy-protected files from the iTunes Store cannot be played on any CDJ. | Replace with a DRM-free version of the track. |
| VBR MP3 | Variable bitrate MP3s work on CDJs but seeking (fast forward/rewind) is noticeably slower than with constant bitrate files. | For best performance, convert to CBR 320kbps. |
| Corrupted WAV header | The WAV file has an invalid or damaged header (missing chunks, wrong sizes). | Re-export or re-download the file. |
| Corrupted AIFF header | The AIFF file has an invalid or damaged header. | Re-export or re-download the file. |
| File path too long (over 255 characters) | CDJs have a 255-character limit on the full file path. | Shorten your folder or file names. |
Modes
- No detection - No scanning or fixing. Files are exported as-is. Issues are still reported if found.
- Warnings only - Scans all files and generates a report listing every issue found, but does not modify any files on the USB.
- Warn & auto fix (default) - Automatically fixes what it can on the USB copy and reports everything.
- Auto fix - Automatically fixes what it can on the USB copy without showing warnings for fixable issues. Unfixable issues are still reported.
A compatibility report is always saved to your Lexicon Reports folder after each sync, regardless of which mode you choose.
Field Mappings
Lexicon supports more fields than all DJ apps do (Energy, Danceability, Popularity field but also your Custom Tags) which can be mapped to normal fields using the Field Mapper.
You can set up different field mappings for each DJ app you sync to and for writing tags directly to your music files. You can also use field mappings when writing your file (ID3) tags.
Editing Field Mappings
On the Sync page or in the Write Tags popup, use the Edit mappings button to set up your field mappings.
A mapping has a source and a target. The source is a field from Lexicon and the target is a field that exists in the DJ app.
For example, all DJ apps have the Comment field that you can map to, but only VirtualDJ has the User1 and User2 fields.
Choosing a mapping Energy ➡ Comment will result in your DJ app Comment fields to look like "Energy 08".
Overwrite
When you enable the Overwrite checkbox, Lexicon will overwrite the field with the new mapped value in the resulting track. If you disable overwriting, then the new mapped value will be appended to the original value.
Combining
You can choose to combine fields by mapping different sources to the same target. The results will be separated by a comma.
For example: Mapping both Energy and Popularity to Comment will result in "Energy 08, Pop 05".
You can combine as many fields as are available.
Engine DJ Color
Engine DJ does not (yet) support track colors. To get your colors from Lexicon in Engine DJ, you can create a field mapping. This will add the color name in the chosen target field. For example, the color Dark Red will be turned into "Red_Dark".
Custom Tags
See the Custom Tags manual page for information on how custom tags are handled.
DJ App Field Compatibility
Depending on your DJ app, Lexicon will automatically map fields as displayed below.
| Field | Lexicon | Rekordbox 6/7 | Rekordbox 5 | Serato 4 | Traktor | Engine DJ | Virtual DJ | Djay | iTunes |
|---|---|---|---|---|---|---|---|---|---|
| Title | ✔ | ✔ | ✔ | ✔ | ✔ | ✔ | ✔ | ✔ | ✔ |
| Artist | ✔ | ✔ | ✔ | ✔ | ✔ | ✔ | ✔ | ✔ | ✔ |
| Album Artist | ✔ | ||||||||
| Original Artist | ✔ | ||||||||
| Album | ✔ | ✔ | ✔ | ✔ | ✔ | ✔ | ✔ | ✔ | ✔ |
| Year | ✔ | ✔ | ✔ | ✔ | ✔ | ✔ | ✔ | ✔ | |
| Track number | ✔ | ✔ | ✔ | ✔ | ✔ | ✔ | ✔ | ||
| Disc Number | ✔ | ✔ | |||||||
| Genre | ✔ | ✔ | ✔ | ✔ | ✔ | ✔ | ✔ | ✔ | ✔ |
| BPM | ✔ | ✔ | ✔ | ✔ | ✔ | ✔ | ✔ | ✔ | |
| Key | ✔ | ✔ | ✔ | ✔ | ✔ | ✔ | ✔ | ✔ | |
| Comment | ✔ | ✔ | ✔ | ✔ | ✔ | ✔ | ✔ | ✔ | ✔ |
| Comment 2 | ✔ | ||||||||
| Grouping | ✔ | ✔ | ✔ | ✔ | |||||
| Composer | ✔ | ✔ | ✔ | ✔ | ✔ | ✔ | ✔ | ✔ | |
| Producer | ✔ | ✔ | |||||||
| Publisher | ✔ | ||||||||
| Lyricist | ✔ | ✔ | |||||||
| Remixer | ✔ | ✔ | ✔ | ✔ | ✔ | ✔ | ✔ | ||
| Mix | ✔ | ✔ | ✔ | ✔ | ✔ | ||||
| Label | ✔ | ✔ | ✔ | ✔ | ✔ | ✔ | ✔ | ✔ | |
| Rating | ✔ | ✔ | ✔ | ✔ | ✔ | ✔ | ✔ | ✔ | ✔ |
| Color | ✔ | ✔ | ✔ | ✔ | ✔ | ✔ | ✔ | ||
| Play Count | ✔ | ✔ | ✔ | ✔ | ✔ | ✔ | ✔ | ||
| Lyrics | ✔ | ||||||||
| Energy | ✔ | ||||||||
| Danceability | ✔ | ||||||||
| Popularity | ✔ | ||||||||
| Happiness | ✔ | ||||||||
| Release Date | ✔ | ✔ | ✔ | ||||||
| Last Played | ✔ | ✔ | |||||||
| Date Added | ✔ | ✔ | ✔ | ✔ | ✔ | ✔ | ✔ | ✔ | ✔ |
| Date Created | ✔ | ✔ | |||||||
| Date Modified | ✔ | ✔ | |||||||
| Extra 1 | ✔ | ✔ (Comment 2) | ✔ | ||||||
| Extra 2 | ✔ | ✔ | |||||||
| Custom Tags | ✔ | ✔ |
Key Conversion
You can choose to convert all keys to Open Key or Musical key notation or leave them as their original keys.
This supports converting from Camelot keys, Rekordbox keys, Traktor keys, Serato keys, VirtualDJ keys and musical notes.
Please note that not every musical key can be converted.
Add leading zero
When converting to Open Key, you can add a leading zero, to better sort keys in some DJ apps. Adding a leading zero will help sort correctly (ex. 01A, 02A… 10A, 11A). Otherwise your result will not be correct (ex. 1A, 10A, 11A, 12A, 2A).
Camelot
Due to licensing restrictions, converting to Camelot notation is not available. The alternative is to use Open Key, which is the same as Camelot but with different letters and no licensing restrictions.
Conversion Limitations
There are a few limitations when converting between DJ apps since not every DJ app has every feature or uses it in the same way.
Cues
Traktor does not have colored cue points so any colors on your cue points will not be visible in Traktor.
Last Played
Rekordbox does not store last played date.
Serato & Engine DJ Playlist Folders
Serato and Engine DJ both allow tracks inside playlist folders. Other DJ apps and Lexicon do not allow this so any track directly inside a folder will not be visible in the Lexicon playlist folder or when converting to any other DJ app.
Remix Sets
Traktor remix sets are not currently supported.
Rekordbox
There are a few limitations and incompatibilities when using Rekordbox, you can read more about that here.
Serato
Serato FLIP is not currently supported.
Serato 3 does not support streaming tracks (Beatport, Tidal, etc) in crates. So if your playlists contain streaming tracks in Lexicon, you will not see those in Serato 3. Serato 4 does not have his limitation.
If you use streaming tracks, make sure the correct streaming track service is enabled in the Serato settings or those streaming tracks will not show up in Serato.
Djay Pro
There are some limitations when syncing to Djay Pro. More info here.
Convert Library
Converting Your DJ Library
Lexicon is great at DJ library conversion with some of the most advanced supported tools like smart playlists, streaming tracks and more.
You can convert your library from Rekordbox, Traktor, VirtualDJ, Serato, Engine DJ, djay Pro or to any of these.
Converting your library works on both macOS and Windows
To convert your library, you have to go through Lexicon, but this is very simple.
The process goes like this:
- Import DJ app library into Lexicon
- Sync Lexicon to another DJ app
You can import from your DJ app into Lexicon by going to the Sync page in the sidebar and then selecting Import tracks & playlists.
Information
The following information will be converted:
- Track info (rating, comments, play count, key and more)
- Track locations
- Cue points & loops & active loops
- Beatgrid markers
- Playlists
- Smart playlists
- Streaming tracks
There are some minor limitations since not all DJ apps have the exact same features, more on that below.
Playlist sync
You can choose to only sync a partial library by setting it to Playlist or Modified. This is useful for the bigger libraries because you only convert what you need. Especially with Rekordbox this is useful because it can take a long time to import back into Rekordbox.
Any track in the partial Rekordbox XML will overwrite the same matching track in your existing library. Other tracks will not be changed.
Beatgrid shift correction
There is a problem between how Rekordbox, Traktor, VirtualDJ and Serato read MP3 files. Most of the time they see the exact same MP3 file but in a small percentage of tracks, a tiny bit of silence (26 or 50 milliseconds) gets added to the start of the track. This causes your cue points and beatgrids to be shifted.
To correct this problem, Lexicon scans and adjusts your tracks automatically whenever you import or sync. This catches most problematic tracks but in rare situations you may still get this problem.
Nearest color
All DJ apps have slightly different colors. You can let Lexicon change your track and cue colors to the nearest similar color. If you disable this option, any color that does not exist in your target DJ app will be set to no color.
Exporting from Rekordbox
If you want to export your beatgrid, you have to select the BPM change points option in the Advanced tab under Rekordbox preferences.
Normally, Lexicon does this for you automatically.
Limitations
Last played
Rekordbox does not store last played date.
Remix Sets
Only Traktor supports remix sets. Lexicon does not support remix sets so these will be lost.
Colors
Rekordbox memory cue colors can't be converted because Rekordbox does not add these to the XML file, this only applies to the XML sync method, not the Direct method. Hot cue colors do work.
VirtualDJ looks like it adds colors to your cue points but it actually doesn't by default. If you go into the POI editor, you will see all your cue points have no color by default. That's where you have to set cue colors.
Engine DJ does not support track colors.
Rekordbox
Rekordbox saves intelligent playlists as normal playlists to the XML, so there is no way for Lexicon to distinguish them. That's why you'll see them as regular playlists when you are importing your new XML. Best thing you can do is to just ignore these, since the intelligent playlists that you already had will update as normal.
Rekordbox can handle up to 16 hot cues but only imports a maximum of 8.
Serato
FLIP entries are not converted. Only 1 beatgrid marker is supported in OGG files. AAC files are not supported.
If the amount of cues and loops cues together exceeds the maximum, then loop cues will be dropped first.
Your database file and crates are always backed up before Lexicon changes them. You can find these backups in the Music/_Serato_/Lexicon folder and on every drive that Serato has tracks on.
Engine DJ
To load album art after converting you can right click tracks in Engine DJ and use "Re-import track information", however it will then reload all tags from files which may be different from the collection. Download a second time to make sure the tags are correct. Or use the Tag Writer in Lexicon to write tags to files so reloading them will result in the same tags.
DIRECT2CDJ
DIRECT2CDJ
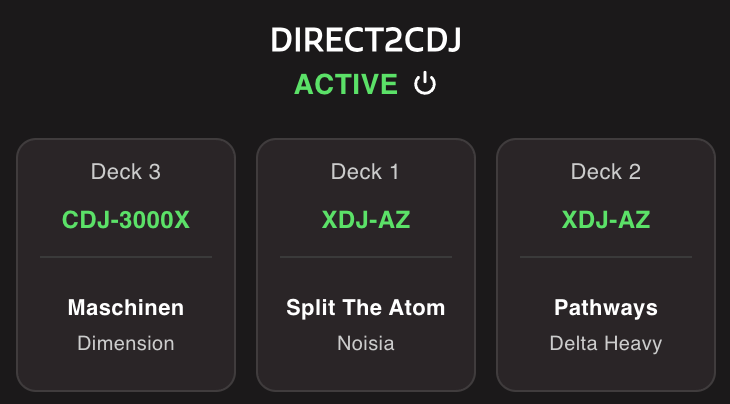
DIRECT2CDJ allows Lexicon to connect to a CDJ directly over the network. This uses Pioneer's Pro DJ Link and is what Rekordbox uses to connect to CDJs. Inside Lexicon we just call it DIRECT2CDJ.
This is intended for quick and easy prep with your CDJ or XDJ at home. Do not use it in a live situation.
Compatiblity
DIRECT2CDJ works on any network capable CDJ or XDJ device.
The XDJ-RX3 use Pro DJ Link over USB and is not supported.
Realtime
When you add or remove cues on the device, they will appear or update in Lexicon immediately so this can be a great way to set your cues on your real gear.
CDJ settings
Lexicon uses your setting files from Rekordbox when connecting to the CDJ/XDJ. So if you want to change settings, you need to do that in Rekordbox and Lexicon will pick that up.
DIRECT2CDJ settings
Settings for DIRECT2CDJ are shared with your Pioneer USB sync settings, on the Sync screen.
Changing Field Mappings, Convert Keys, Nearest Color or Cue Destination on the sync screen for Pioneer USB will also affect how DIRECT2CDJ handles that.
Lexicon Settings
Lexicon Settings
This page describes all available settings in Lexicon. Access the Settings page from the top menu bar.
Appearance
Theme
Choose between Dark, Light, or System theme. The System option automatically follows your operating system's theme preference.
Options: Dark, Light, System
Language
Choose the UI language. Requires restart.
Translations are AI-generated. If you find incorrect translations, please submit corrections on the Lexicon Discord.
Options: English, Deutsch, Ελληνικά, Español, Français, Italiano, 日本語, Nederlands, Polski, Português (Brasil), Русский, ไทย, Türkçe, Tiếng Việt
Show Tips
Display helpful tips on the music player when no track is loaded. Requires restart.
Show Hotkeys
Display keyboard shortcuts throughout the interface whenever they are available. Requires the Hotkeys subscription feature.
Automatic Actions
Auto Analyze New Tracks
Automatically analyze tracks added by dragging into Lexicon or via the Watch Folder. Does not apply to tracks imported from a DJ app.
Auto Generate Cues on Play
Automatically generate cue points when playing a track without cues, using the current generator template. This option is ignored if Custom Cue Anchors are enabled.
Auto Re-encode New MP3, MP4 and M4A Files
Automatically re-encode tracks added to Lexicon (via drag & drop or Watch Folder) to fix potential beatshift issues, using the Beatshift Fixer. Does not apply to tracks imported from a DJ app.
Auto Write File (ID3) Tags
Automatically write ID3 tags to your files whenever a change is detected. Uses your field mappings if configured. Automatic writing does not occur for bulk edits over 1000 tracks; manual tag writing is required in those cases.
Automatically Find Custom Tags for New Tracks
When new tracks are added, genre custom tags are looked up automatically. Only custom tags are added; the genre field itself is not changed.
General
Minimize to Tray (Windows only)
Minimize Lexicon to the system tray when closing the window instead of fully closing the application.
Date Format
Choose how dates are displayed throughout the application.
Options:
2021-06-25(YYYY-MM-DD)25/6/2021(D/M/YYYY)Jun 6th 2021(MMM Do YYYY)2021-06-25 22:50(YYYY-MM-DD HH:mm)25/6/2021 10:50PM(D/M/YYYY h:mmA)Jun 6th 2021 10:50PM(MMMM Do YYYY h:mmA)
Key Format
Choose how musical keys are displayed in Lexicon.
Options:
- Open Key
- Original key
- Open Key with original key
- Musical key
- Musical key with original key
- Custom keys
- Custom keys with original key
When using Custom keys, click "Edit Custom Keys" to define your own key notation for each Open Key value.
Key Mixing Mode
Determine how key compatibility is calculated in the track browser. Key compatible tracks are displayed in track browser with a small music note next to their key.
Options:
- Harmonically Compatible: Traditional harmonic mixing rules (e.g., 10m → 11m or 10m → 10d)
- Fuzzy Key Mixing: Expanded compatibility based on adjacent open key numbers (e.g., 10m → 9m/9d or 10m → 11m/11d)
Field Mapping Custom Tag Format
The text format used for field-mapped Custom Tags.
Options:
- Hashtag:
#Techno #Vocals - Comma:
Techno, Vocals
Display Currency
The currency in which third-party store prices are displayed. Prices are converted by Lexicon and may differ slightly from actual store prices.
Options: US dollar (US$), Euro (€), Pound sterling (£), Australian dollar (A$), Canadian dollar (C$), Japanese yen (¥)
Load Mixed In Key Cues/Beatgrid
Automatically load Mixed In Key cue points and beatgrids from track ID3 tags when adding tracks via drag & drop or Watch Folder. Also applies when reloading tags on tracks without existing cues/beatgrids.
Drag Out of Lexicon
Allow dragging tracks out of Lexicon to other applications. Note: Dragging to DJ apps does NOT include cue points and beatgrids. Requires restart.
Enable Auto-fill Suggestions
Show a list of suggestions when editing any of the fields in the track browser with recurring values, such as artists, albums and more. Affects Artist, Album, Genre, Composer, Producer, Lyricist, Grouping, Remixer, Mix, and Label. Requires restart.
Remember Table State per Playlist
Remember the table state (scroll position, sort order, filters, and selected tracks) when switching between playlists and the main track browser.
DJ App Specific Features
Click "Configure" to show or enable features that Lexicon hides by default because only certain DJ apps support them.
Currently available:
- Rekordbox Memory Cues - When enabled, shows the memory cue option where relevant. Memory cue options appear in the cue icon (M) on cues in the music player, the cue point generator, and the smartlist editor under the Cue Points field. Only functions for Rekordbox and does nothing for other DJ apps. Requires restart.
Music Player
Autoplay on Track Load
Automatically start playing when a track is loaded into the music player.
Autoplay Next in Queue
Automatically play the next track in the queue when the current track ends.
Disable Active Loops When Queue Is Visible
When enabled, active loops will not trigger while the track queue is visible. Useful when using Lexicon as a music player so listening is not interrupted by active loops triggering automatically.
Show Milliseconds
Display time with millisecond precision in the music player.
Metronome Settings
Click "Configure Metronome" to adjust:
- Enable metronome: Toggle the metronome on/off (also available in the music player under Edit Grid)
- Volume: Adjust metronome volume (10%–500%)
- Pitch: Adjust metronome pitch/tone (10%–500%, lower or higher)
Use the Preview Metronome button in the dialog to audition your settings.
Cue Colors
The default color scheme applied to new cue points.
Options:
- Basic: Only colors available in any DJ app
- Grayscale: Gray tones
- Cold: Blue/cool tones
- Warm: Red/orange tones
- Random: Random unused color
- No colors: No color assigned
- First cue color: Match the color of the first cue point
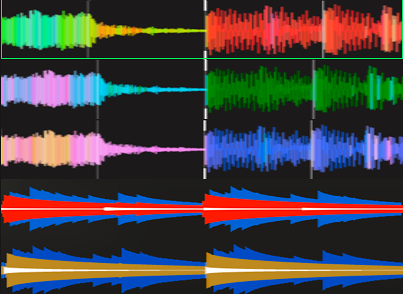
Waveform
Choose the waveform color scheme.
Options:
- RGB / "Catla"
- Blue Green / "G-Force"
- Pink Blue
- 3 Band (Blue/Red)
- 3 Band (Blue/Yellow)
- Custom (define your own Low, Mid, High colors via "Edit Colors")
When switching between 3-band and non-3-band waveforms, the waveform cache needs to be updated. Re-analyze tracks or play them to update the waveform display.
Beatgrid Numbering
Choose how beats are numbered in the beatgrid.
Options:
- Start at zero: Makes the entire beatgrid divisible by four with consistent positive/negative beat numbering
- Start at one: Traditional DJ app behavior (recommended for familiarity)
Track reload required to see changes.
Overview Cue Bar Numbers
Show the bar number next to each cue point in the overview waveform.
Load Position
Where the playhead starts when loading a track.
Options:
- Start at first beatgrid marker
- Start at zero
- Start at first cue point
Enable Keyboard Media Keys
Control the Lexicon music player with keyboard media keys. Note: Media keys will not work in other applications while a track is loaded in Lexicon.
Preview Duration
Duration (in seconds) of the preview when clicking a waveform in the track browser. Range: 1–300 seconds.
File Management
Remove Empty Folders
Automatically remove empty folders after tracks have been moved via the Incoming screen or File Move utility. Important system folders (e.g., user directories, root drives) are protected and will not be removed. Common files like folder.jpg, cover.jpg, Thumbs.db, and .DS_Store are ignored when determining if a folder is empty.
Backup & Cloud Storage
Cloud Database Backup Reminder (Ultimate only)
Show a reminder notification if your last cloud database backup was more than a week ago.
Cloud Storage Connections (Ultimate only)
Number of simultaneous upload/download connections for cloud storage. Increase this number for faster transfers if your network supports it. Range: 1–50. Requires restart.
Accessibility
Display Scaling
Adjust the overall interface size. Range: 50%–200% (step 10%). Changes apply immediately.
Increased Waveform Height
Double the height of the zoom waveform for better visibility. Requires restart.
Custom Font (Google Fonts)
Use any font from Google Fonts. Enter the font name (e.g., "Open Sans", "Poppins", "Roboto") and click "Load Font" or press Enter. Leave empty to use the default Roboto font.
Browse available fonts at fonts.google.com.
Advanced
Enable Local Path Mappings (Ultimate only)
Enable path mappings to override where Lexicon looks for your tracks. Use this when running Lexicon on multiple computers with the same music files. Path mappings are stored locally per computer.
Click "Edit Path Mappings" to configure mappings between remote paths (from your primary computer) and local paths (on this computer). For example, map D:/Music/ to /Volumes/My External Drive/Music/ to use the same library on Windows and Mac.
Advanced Overrides
Low-level override settings exposed as a property sheet. Intended for advanced troubleshooting and development use.
Base overrides:
seratoDatabaseFolder- Custom Serato database folder pathtraktorNmlPath- Custom Traktor NML file pathvirtualdjHomeFolder- Custom VirtualDJ home folder pathtrackDeleteDontAskAgain- Skip track delete confirmationtrackInPlaylistDeleteDontAskAgain- Skip track-in-playlist delete confirmationplaylistDeleteDontAskAgain- Skip playlist delete confirmation
Other
Reduced Performance
Reduce the number of concurrent threads used by Lexicon. Only enable this if you experience crashes during heavy processing tasks like track analysis or duplicate scanning. Requires restart.
Send Anonymous Usage Statistics
Help improve Lexicon by sending anonymous usage data. This data is not used for any other purpose.
Reset Settings
Reset Smart Fix Ignore Entries
Clear all "ignore" entries for Smart Fixes, allowing previously ignored issues to appear again.
Reset Tooltips
Reset all hidden tooltips so they appear again on next restart.
Reset Hidden Popups
Reset all "Don't show again" popups so they appear again. This includes import warnings, sync instructions, and confirmation dialogs.
Action Center / Find Popup
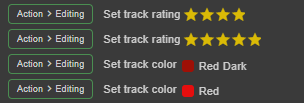
Action Center
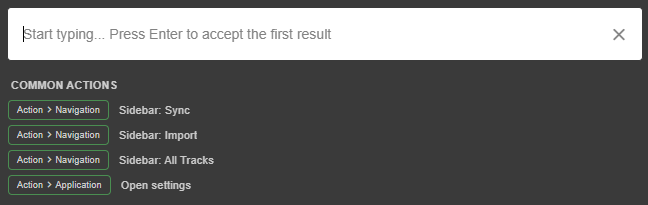
The action center lets you execute any command or go to any screen instantly.
By default, the hotkey to open the action center is:
Windows: CTRL+Spacebar
macOS: CMD+Spacebar
You can navigate the results with the Up & Down arrow keys. Press Enter to execute the highlighted result. Pressing Enter when no result is highlighted yet will execute the first result.
You can do anything that can be bound to a hotkey in the action center, just start typing:
Find Popup

The Find popup lets you look through your playlists, smartlists and tracks instantly. Just start typing and Lexicon will know what you are looking for.
By default, the hotkey to open the search is:
Windows: CTRL+F
macOS: CMD+F
You can navigate the results with the Up & Down arrow keys. Press Enter to play the highlighted result. Pressing Enter when no result is highlighted yet will play the first result.
There are some useful features in the search popup.

The first button (playlist-plus) will add any of your selected tracks to that playlist. The second button (plus) will add tracks or playlists to your Play Queue. The third button (play) will play the track or playlist.
Analyzer
Analyzer
Lexicon has a state of the art audio analyzer packed with features that DJs need.
BPM & Beatgrid
The analyzer has a very accurate BPM and beatgrid analyzer, below is a result summary of the current first beat accuracy:

On our current testing dataset, it analyzes by far the most within 3ms accuracy of the precisely correct result. The On-Grid results are also acceptable results on the beatgrid but may be offset by 4 or 16 beats or so but still fine for DJing. Range-Error tracks are analyzed properly but require the user to specifically set the BPM range, e.g. for extremely low or high BPM tracks.
Dynamic analysis, for tracks that change BPM, is not yet available. But you can add as many BPM changepoints as you want manually and they are imported from any DJ app as well.
Waveform
Waveform analysis is required to show a waveform for your tracks. This happens on demand as well but is faster to do in bulk.
You can adjust your waveform in the settings to 3 preset options or 2 of the three-band waveforms, or choose custom colors.
After changing colors, you need to re-analyze your tracks for Waveform. If you did not change waveform colors, then you can safely keep Waveform checked in the Analyze popup as it will not re-analyze unless colors changed.
Energy
Energy analysis can fill the Energy field on your tracks. This works for any track as it scans your audio files. You can also use the Find Tags utility for energy but this pulls data from Spotify so it requires your tracks to exist on Spotify, so it will not work for unknown remixes or bootlegs. It also uses a different algorithm so you will get different energy results than from analyzing.
The energy analyzer uses an absolute based energy system which means that it tries to ensure that the more chill tracks are on the lower end and the more powerful, faster tracks are on the higher end. However this does not always work due to how music can be structured so your mileage may vary.
Key
Key analysis is essential for DJs to make harmonically compatible sets. Lexicon has two analysis algorithms for this. The built-in Lexicon analyzer performs adequately, it's fast and requires no extra setup.
We also offer the free OpenKeyScan integration for results that match industry leading paid analysis software.
You can see both Lexicon and OpenKeyScan (using MusicalKeyCNN) in this community benchmark
OpenKeyScan
OpenKeyScan is a standalone application, you can download it for free on the website. OpenKeyScan is made by the same developer as Lexicon.
In short, OpenKeyScan is a 100% free application that delivers key results similar to the industry leading key analysis software. It integrates seamlessly into Lexicon, all you need to do is leave OpenKeyScan running in the background and Lexicon can use it for its key analysis. You can also use OpenKeyScan without Lexicon by writing to ID3 tags or updating your DJ app with it.
Cues
The analyzer also includes a cue generator in a separate utility inside Lexicon, see Cue Point Generator.
Auto analysis
Auto-analysis is enabled by default so new tracks get the missing info as they are added to Lexicon. You can turn this off in the Analyze popup or in the Lexicon settings. This only applies to tracks added by dragging into Lexicon or through the Watch Folder. Tracks imported from a DJ app do not get auto analyzed.
Archive
Archive
You can archive your tracks so they no longer appear anywhere in Lexicon, but they are not completely gone yet. Archived tracks only appear in your Archive (under Tracks) and in the playlist they were already in when the track was archived.
Your archived tracks will keep their cue points and all their data. They are simply placed in the convenient archive so you can sort them out or delete them at a later time.
You can archive tracks by right clicking them in the track list. You can un-archive tracks by right clicking tracks in the music archive.
Playlists
When you archive a track directly from within a playlist, the track is removed from that playlist immediately. If the track also appeared in other playlists, it will still be there. When you archive a track from the track browser (without being inside a playlist), the track will still appear in all your playlists.
This is so you can archive tracks without worrying about breaking your playlists.
When you run the cleanup, the tracks are also removed from all your playlists.
Cleanup
Lexicon can help you clean up your archived tracks. Use the Selection helper to automatically select tracks that have already been in the archive for some time. You can also tell Lexicon to only select tracks without cue points or tracks that don't appear in any playlist.
When you have selected tracks you want to get rid of, press the Cleanup selection button. By default, your tracks will only be removed from Lexicon. If you want, you can also remove them from your computer.
Keep in mind that removing from your computer is permanent, so make a backup if you are unsure.
Artist Cleanup
Artist Cleanup
You can find Artist Cleanup in the sidebar under Quick Fixes
Artist Cleanup is a tool very similar to Genre Cleanup, it allows you to very quickly consolidate your artists.
Usage
Select any artists that you want to consolidate into one artist. Type that artist (or SHIFT+click any artist) in the New Artist field. When you save, all tracks with one of the selected artists will get changed to the new artist.
You can use SHIFT+Click on any artist to auto-fill that artist as new artist.
You can filter on an artist in the track browser by using ALT+Click or OPTION+Click on any artist. This works really well when you have the Sidepanel open.
Lock Artist
You can lock artists by right clicking them. This prevents selection so they won't accidentally change. Locked artists can be found quicker in the "New artist" autocomplete so you won't easily pick the wrong artist there. A recommendation is to start by locking all your proper artist names so cleaning them up will be quicker after that.
Pin Letter
You can pin a letter so you can scroll it vertically, this makes it easier to navigate. This is remembered between sessions so you can easily continue later.
Track Browser
You can right click any artist and this will take you to the track browser and only show tracks from that artist.
Settings
By default, only artists from the Artist field are used. You can enable different fields here, like Remixer, Producer, Composer and Lyricist. Enabling one of these fields will also update those fields when renaming an artist.
You can sort the artists in the Artist Cleanup screen alphabetically or by amount of tracks each artist has.
Backup
Database Backup
You can quickly make Lexicon database backups to keep your hard work safe. Backups are very quick and always a good idea when you are about to do something you are not sure about. For example, relocating a lot of tracks or throwing away a lot of old tracks.
Creating a Backup
You can create a backup of your Lexicon library by going to the top menu bar Backups ➡ Database Backup ➡ Create backup.
This will create a backup of your tags (artists, title, cue points, etc), playlists and settings.
Keep in mind that this backup does not back up your music files. You have to do that separately.
To backup your music, take a look at Cloud Storage.
Restoring a Backup
You can restore a backup by going to the top menu bar Backups ➡ Database Backup ➡ Restore Backup and choosing the backup ZIP file that Lexicon created.
By default, Lexicon stores backups in your Documents/Lexicon/Backups folder. So if you're ever looking for an older backup, start by checking that folder. Keep in mind that Lexicon automatically cleans this folder, backups older than one month will automatically be deleted. If you want to keep backups older than that, move them to a different folder.
Restoring a backup completely deletes your old database so proceed with caution.
Cloud Database Backup
You can backup your Lexicon database to the cloud so you never need to worry about losing your cue points, playlists and other hard work again. Your backup will be kept safe in the cloud and you can always restore your database, even if you log in to a different computer.
If you are on the Ultimate plan, you will automatically get a weekly reminder to make a cloud database backup. You can disable this reminder in the settings.
To manually create a backup or restore a backup, go to the top menu bar Backups ➡ Database Backup ➡ Cloud Database Backup.
There is a limit of 10 cloud database backups.
Music File Backup
There are many options to back up your music files. Take a look at Cloud Storage, this lets you back up your music fully integrated into Lexicon.
DJ App Backups
Lexicon creates a backup before writing to DJ app databases. You can always find backups of your DJ app database in the Lexicon folder in each corresponding database folder.
You can find all backups locations for each DJ app and Lexicon on this page.
Cloud Storage
Cloud Storage allows you to upload your music files to the cloud so you don't need to worry about losing them anymore. Cloud Storage is available on all plans with limits with the optional addon for unlimited (fair use policy applies) cloud storage.
A report is created each time you up- or download files. You can find the report in your Documents/Lexicon folder. This report will contain a list of all up- or downloaded files and any errors should something have gone wrong.
Limits
There are limits to how many tracks you can upload unless you purchase the Cloud Storage Add-on.
Essential has a limit of 1,000 tracks and Ultimate has a limit of 10,000 tracks. This is both for the monthly subscription and lifetime options.
With the add-on, you will have unlimited* tracks to upload (* fair use policy applies, see limitations below).
Uploading
To upload tracks, right click any track or playlist and select Upload to cloud. This will put these tracks into the upload queue and Lexicon will take care of the rest.
If your track has successfully uploaded, a green cloud icon will appear.
Downloading
There are two ways to download your music.
The first is simple, you can download your cloud music by right clicking any playlist and choosing Download from cloud. It will try to download them to the original location and if that is not possible, Lexicon will ask where to download them to.
The second way is to use the Cloud Storage page in the Lexicon settings.
Any track that is missing can be restored from there, if it has previously been uploaded. You can disable the Original location option to move the downloaded file to a new location. This is useful when you no longer have an external drive where you originally uploaded from, or if you are restoring tracks on a different operating system (from Windows to macOS or vice versa).
In the emergency situation where you no longer have your database or your music files, you can still restore your tracks from the cloud. To do this, go to the Cloud Storage page in the Lexicon settings and choose Manage Cloud-Only Tracks. From there, select all tracks and choose to restore them.
Streaming
Any track that has previously been uploaded will be available for streaming. This means that even if you do not have the track on your computer, you can still play it. Lexicon will download it on-demand.
You can create a database backup (see Database Backup in the manual) and restore that backup on a different computer. That will allow you to stream tracks into the Lexicon with the restored database, even though you did not copy any of the music files.
Limitations
Your plan has a limited amount of cloud storage tracks included. With the optional addon, you can upload (nearly) unlimited files to the cloud.
There is only a "fair use policy" with the following limitations:
- Your files must be music files
- Your files must be less than 200MB each. That means you can't upload mixes.
- For users with the addon, there is a "soft limit" of 4TB (about 400.000 MP3's). You can go over this limit but we may reach out to you to discuss your storage needs.
To prevent file sharing (which is absolutely not allowed) there are also limits in place to prevent downloads from happening in too many different locations.
Beatport
Beatport
You can enable the Beatport integration in the Lexicon settings under Integrations. After that, you can find it in the sidebar.
Catalog & Filters
You can browse and search the entire Beatport catalog. Filters can be set up in the filter panel on the right so you can browse genres, subgenres or even by label or artist. Filters can be saved by typing a filter name at the bottom of the filter panel and saving it. The last used saved filter will be used by default.
Drill Down
You can drill down into any artist, label or album by selecting a track and then clicking the small zoom/magnify icon next to the artist, label or album name.
Following
Artists & labels can be followed and will appear in the special gold color anywhere in the Beatport integration. You can follow artists & labels by right clicking them or by enabling the follow toggle button on the artist or label detail page.
Once you follow an artist or label, they will appear in the Top and Charts tabs so you can quickly check their charts.
My Cart
Any track can be added to your cart by clicking the cart icon on the right.
To purchase the tracks in your cart, go to the My Cart tab and click the button to go the Beatport website. Once logged in, you will be in the Lexicon cart and you can proceed to purchase the tracks there. Lexicon will ask if you want to empty the cart once you return to Lexicon.
Downloaded Tracks
After purchasing and downloading tracks, you will probably want to add them to Lexicon. Lexicon is smart and has a nice trick here for you: Any purchased track from Beatport you drag into Lexicon will automatically replace the same Beatport streaming tracks in your playlists.
This means you can get a really great workflow by building playlists with streaming tracks, even when you can only preview them. Once you've purchased and downloaded from the Beatport website, drag the purchased tracks into Lexicon and all your playlists will automatically update using the local files on your hard drive!
For WAV files this will only work if you keep the original filename that has the track ID in it.
Keep in mind you do need to be logged into the Beatport integration in Lexicon for this to work.
Global Search
You can quickly search Beatport from anywhere by using the Lexicon Find popup. You can reach it from the top menu bar ➡ Edit ➡ Find. The default hotkey is Cmd or Ctrl + F.
Hotkeys
There are several configurable hotkeys available in the Lexicon settings. You can show any available hotkey by turning on the Show Keyboard Shortcuts setting.
There are other non-configurable hotkeys available, depending on which Beatport page you are:
Backspace: always goes back to the previous screen
Enter: loads the currently selected tracks into the music player
Cmd or Ctrl + Right Arrow: goes to the next page of tracks
Cmd or Ctrl + Left Arrow: goes to the previous page of tracks
T: on artist or label page, show Top 10 for this artist or label
R: on artist or label page, show release for this artist or label
A: on artist or label page, show all tracks for this artist or label
C: on artist or label page, show charts for this artist or label
Charts
Charts
You can find Charts in the left sidebar menu
If you want to stay up to date, you need a quick and easy way to see what is popular right now. With Charts you can create playlists in your library as long as you have the tracks already. Lexicon will find them automatically.
Chart sources
There are several chart sources to choose from.
Apple Music / iTunes
Set the chart source to Apple Music to see the top 100 in the most popular genres on Apple Music. This chart source is good for pop music.
Not all music genres are represented on Apple Music, only the most active ones. For most EDM genres Apple Music does have popularity numbers but very outdated so that's why you can't see these.
Tracks are marked as NEW if they were added to Apple Music in the last 4 weeks. These charts are updated every day.
Shazam
Set the chart source to Shazam and you can choose any country or city in the world to see the most "shazamed" tracks in that area. This chart source is great if you have an event where you're not up to date on the hits.
Historical
The historical charts will show you the top 100 tracks of every year since 1950.
Beatport
The Beatport charts will show you the top 100 of each genre that Beatport has. These charts are updated every day.
Billboard
The Billboard charts will show you the current Hot 100, R&B, Dance/Electronic and Country music.
Finding tracks
Any track that you already have in your library is marked with a double checkmark. This works by matching the track title and artist. If there is a mismatch then you can mark a track as such by right clicking it. You can also mark tracks manually and they will get a single checkmark. Tracks with a single checkmark were not automatically found by Lexicon so it won't be able to add those tracks to a playlist. Only tracks with a double checkmark can get added to a playlist.
Protip: If your tracks aren't matching properly because your track titles are low quality, try using Smart Fixes to clean them up.
Only new tracks
You can choose to only show the newest tracks in charts that support this. How new a track needs to be depends on the chart.
- Apple Music / iTunes: this will only show tracks added to the chart in the last 4 weeks.
- Beatport: this will only show tracks added to the chart in the last week.
Cue Point Generator
Cue Point Generator
You can find the Cue Point Generator by right clicking tracks ➡ Track tools ➡ Generate Cue Points
Using the cue point generator, you will be able to let Lexicon add cue points to your tracks automatically. Through machine learning it can accurately detect drops, breakdowns and the fade-out of the track. You can tell Lexicon exactly where you want your cue points, how to name them and what color they should be.
Expectations
The cue point generator can detect the drop and breakdown accurately, but this strongly depends on the music genre. Music with a lot of bass throughout the entire track will be less accurate.
For example, the genres Techno, House, Drum & Bass have a high success rate in the cue point generator. On the other hand, genres like Reggae or Dancehall are less accurate and may have trouble detecting the drop.
The cue point generator is not a total replacement for manual cue points. Manually setting your cue points will always be more accurate. For the fastest way to set your cues by hand, see this guide.
Auto analyze
You can turn on auto-analyze in the Cue Generator popup or in the Lexicon settings. When enabled, it will automatically generates cues based on your last used cue template for any track you load that does not yet have cues.
Requirements
Automatically adding cue points to your tracks does come with a few requirements.
Analyze
Tracks must have a beatgrid. Lexicon will analyze tracks automatically if no beatgrid is found. You can also use a DJ app to create beatgrids for your tracks and import them into Lexicon. If the analyzed BPM is not correct (for example, Rekordbox sometimes sets tracks to 87 BPM instead of 174 BPM) then that could negatively affect drop detection.
Sometimes beatgrids are not set quite right (this happens especially often on Rekordbox) that can result in cue points like these:

The way to prevent this is by going through your analyzed tracks manually before generating cue points and checking the grid quickly.
Accuracy
Cue point generation is done with advanced machine learning techniques for the best possible accuracy. The algorithm is optimized for all music and not one specific genre or type. This means sometimes results may be off by a bit or a drop can't be found.
Genre
Lexicon takes the genre the tracks have into account for more accurate results because the audio structure is not always the same. While it is not essential, it will improve results if you have the correct genre in the Genre field.
End / Fade-out
Lexicon tries to find the best fade-out moment in your tracks. Only lower frequencies (bass) are considered here which means that the fade-out will be set before quiet outro's. You probably want to mix your next track before you reach that part.
Rekordbox does not allow 2 memory cues on the same position. So should the fade-out and second breakdown occur at the same timestamp, then one of the two will not show in Rekordbox.
Cue point template
You can create your own cue point templates. For example, you could say you want a cue point 64 beats before the drop. If Lexicon detects a drop, a cue point will be added exactly 64 beats before it.
Lexicon will save the cue points in the order as they are in your template. With the handle on the left, you can drag cue points. You can disable cue points by unchecking them. You can still create a cue point that relies on the drop, even if the drop is disabled.
You can choose to create a memory cue for Rekordbox if you enabled that DJ app specific feature in the Lexicon settings.
If you add more cue points than your DJ app can handle, Lexicon will try to intelligently remove the least interesting ones first. It's best to stay under 10 cue points.
Custom cue anchors
Custom cue anchors is an advanced feature that allows you to set up your own base cue points like the drop, breakdown, etc. You can then use the Cue Point Generator to apply your cue template to the cues you've already set up. This will skip the entire cue generation process and only apply the template.
You can tell the Cue Point Generator to match any name/color combination of existing cues to the Drop/Breakdown/etc. You'll also get suggestions of your own cue point templates. It's best to pick one of those in order to reduce mistakes. The name and color need to be exactly right or there will be no match.
If you only add a name and no color to the custom anchor, it will take the first cue with that name, ignoring any colors. If you only add a color and no name to the custom anchor, it will take the first cue with that color, ignoring any name.
There is a hotkey to apply your last used generator template to the selected tracks. This only works if the Enable custom cue anchors option is enabled in the advanced settings of that generator template.
Start cue behavior
You can control how the Start cue is determined with this setting. There are three options:
At first beat: On the first detected beat of the track.
At existing cue: On the first existing cue of the track, if there is one. Otherwise, first beat.
At zero: Always at the start of the track (0:00).
Breakdown min. beats
Use this setting if you want very short break sections to be considered as a breakdown. Generally 64 or 128 beats is a good setting, depending on your genre.
Drop at start
Use this setting to control what happens if the generator finds a potential drop near the start of the track.
Never: Ignore it and look further into the track for the real drop.
High energy only: Use it as the first drop but only if it is high energy. This still skips intro's or very short high energy segments. Good for techno if you want a drop at the start.
Keep cue position
If you prefer to always have certain cue points in a specific position (e.g. always the drop first or an emergency loop as cue #8) then enabled this option. Cue points will be set at the same position as the generator template. You can add and drag custom cues to fill up the template. Unchecking a custom cue will create an empty cue at that position.
Emergency loop
You can let Lexicon set an emergency (active) loop. The cue generator will try to find an appropriate spot for a loop of the requested length. The cue generator uses an advanced algorithm to attempt to find a loop spot that is likely to loop well, so the end should connect well to the beginning of the loop.
Common issues
The cue point generator tries its best to analyze any music file, but because there are so many different styles of music, things sometimes go wrong. Here are some common things you may see.
Drop/breakdown is offset by exactly 1 or 2 bars
You might see drops or breakdowns that are 1 or 2 bars off from the correct position. This happens when the producer of a track adds 1, 2 or 3 extra bars somewhere in the track, usually during/after the breakdown. Lexicon syncs cue points to the beatgrid based on 4 bars, since almost all electronic music works like that. You have to fix this manually, Lexicon can't detect if this is happening in a track.

Drop not found at all
This can have several causes.
Energy: Lexicon detects drops by comparing the amount of energy throughout the track. Some tracks have very little energy and a drop might not be found at all.
Incorrect BPM: If a track is analyzed with a BPM that seems correct but is actually half of the actual BPM (e.g. 87 instead of 174), the results will be less accurate. Rekordbox sometimes does this.
No breakdown found or no second drop found
If the first breakdown is not found, then a second drop or second breakdown will also not be found. In some tracks the breakdown is very short so Lexicon cannot easily detect it. By default, Lexicon assumes breakdowns are 64 beats or longer. You can change this to be any number you want. For some genres it makes sense to lower this number to 32. With a lower minimum beat length for the first breakdown, Lexicon may automatically find the second drop and second breakdown.
Custom Tags
Custom Tags
Lexicon has the most advanced tagging capabilities out there. You can completely customize the tags and categories to suit your workflow.
For example, custom tags allow you to mark tracks as "Techno" or "Has Vocals" or anything you want. Later when you are looking for a certain track, you simply click all the tags it needs have and Lexicon will show you the matching tracks.
Categories
Lexicon uses categories in which your tags fall. A category can be something like "Mood" or "Genre" or anything else you want.
You can add new categories by clicking the Add category button on the Tags page. You can edit categories by clicking the gear icon on each category panel. To visually recognize categories faster, you can give it a color.
You can drag and re-order categories on the Tags page.
Creating and Updating Tags
Click the plus icon on a category panel to create a new tag. Double click any tag to rename it.
Right click to delete a tag. The tag will be removed from all tracks.
You can drag tags from one category panel to another. You can completely customize your tag experience this way.
Adding Custom Tags To Tracks
You can add custom tags to your tracks in several ways.
The first is to show the Tags column in the track browser. Click on an empty tag to show the Tags popup and you can select any number of tags.
The second way is with track recipes. This is super powerful if you need edit tags for many tracks at a time. Select any number of tracks and right click and Edit. Switch to recipes and you'll see the tag recipes that allow you to add, remove or replace tags.
Search Custom Tags
You can search Custom Tags in several ways:
- The quick way by using the Track Browser filters at top, see the Track Browser page for more info.
- The advanced way by creating a smartlist with advanced rules
- By going to the Custom Tags page in the left sidebar, choosing tags and showing the results.
Importing Custom Tags
If you are a Rekordbox 6/7 user and use MyTags, then your tags should already be in Lexicon. MyTags are imported automatically when you import your library from Rekordbox 6/7.
You can also import tags from a text based system, such as the hashtag system. The hashtag system uses tags like "#Techno #Vocals" in your track comments. To import these to tags, select any number of tracks, right click and choose Edit. Switch to recipes and choose Import tags from text.
All tags that Lexicon did not yet know about will be in the "Imported Tags" category. You can drag them out into the right category.
Exporting Custom Tags
Tags can be synced to your favorite DJ apps by using the Field Mapper. To do this, open the field mappings dialog on the Sync page. Select All Custom Tags as your source and Comment (or another field) as target. All tags on each track will copied to the Comment field as the hashtag system, e.g. "#Techno #Vocals".
You can also use any of your tag categories as source. Only the tags from that specific category will then be exported.
Rekordbox is limited to 4 MyTag categories, see here for more information.
Showing Tracks
A tag system would be incomplete without a way to find the tracks you are looking for. For this, you can select any number of tags (use CMD/CTRL or SHIFT to select multiple) on the Custom Tags page and then click Show tracks. This will show you all tracks that match the selected tags.
This works like this: any tags in the same category will be considered an OR and every different category is considered an AND. That probably sounds confusing, so as an example:
In the Genre category both "Techno" and "Drum & Bass" is selected. In the Vocals category, only "No Vocals" is selected. This will result in any "Techno" OR "Drum & Bass" track AND they must have "No Vocals".
Keyboard Shortcuts
There is a keyboard shortcut to open the tag popup (default T).
When the tag popup is open, you can navigate with the keyboard using Arrow Up and Arrow Down. You can type to filter tags and navigating tags will only navigate within the filter results. Pressing Enter will add or remove a tag. Pressing Escape will save and close the popup.
You can also assign keyboard shortcuts to specific tags. Right click any tag in the Custom Tags page to assign a number to it. Then assign a hotkey to that number in the Lexicon settings.
Find Broken Tracks
Find Broken Tracks
You can find the broken track scanner in the top menu bar under Utility
With Find Broken Tracks you can scan all your tracks and check if every track exists and all audio files are playable. If this is not the case, the track is considered broken.
You can let Lexicon remove broken files from your library and computer. The broken tracks will also be removed from your playlists.
Text report
After deleting your files (if you choose to do so), a report is generated in the Documents/Lexicon folder. This report contains a list of all files that were deleted. It also shows which playlist contained the file that was deleted.
This report is created so you can easily replace these tracks with working versions.
You can also save the broken file paths as a text file without deleting anything.
Re-importing in your DJ app
After you've used the scanner, your DJ app will still contain links to old files that no longer exist. You can let the DJ app automatically remove these files for you. You can also delete your entire library before importing everything, then all old files will definitely be gone.
Find Duplicates
Find Duplicates
You can find the duplicate scanner in the top menu bar under Utility
With Find Duplicates you can scan all your tracks in your library and automatically compare them based on the audio signature or tags. This way truly identical audio duplicates are found. This even works with different file types. If you have an MP3 and a WAV with the same audio, Lexicon will match them and lets you choose which one you want to keep.
Only tracks that are 15 minutes or less in duration are scanned by audio signature. Tracks with a longer duration are skipped. Tracks shorter than 15 seconds are also skipped by the scanner.
The audio signatures are stored in your library. The first scan may take longer but subsequent scans will be much faster.
Lexicon also checks your tracks for duplicate artist/title combinations. These results will not have an exact audio signature match but the artist/title check is pretty strict so they are almost always the same track. To recognise these artist/title combinations, your tags need to be clean. Consider using Smart Fixes to make sure your titles are as clean as possible.
You can stop the scan at any time and you will be able to continue with the results that were found up to that point. If your scan takes a very long time, it might be wise to do this in a few steps.
Explained
After the scan, which can take quite some time, you will be presented with a list of duplicates. A "duplicate" consists of two or more tracks. Lexicon will have intelligently preselected tracks based on bitrate, cues and more.
You can accept these results as they are, but it would be wise to go through the results and see if everything looks good. If you have many duplicates, it can really speed things up to use the Prefer option, see below.
When you are done going through the results, press the Review button to see which tracks are going to get archived. Do one last check to see if that all looks good and archive them.
Your playlists are now updated so the archived tracks are no longer in them. The playlists are still correct as the bad tracks have been replaced by the good tracks from the duplicates. You will find the bad tracks in the Archive where you can clean them up (delete or move) them at any time.
Manual Merge
If you already have the tracks next to eachother or they differ too much to be considered duplicates, you can manually merge them. Do this by selecting them ➡ right click ➡ Send to ➡ Duplicate merge.
This will skip the entire scan process and only focus on these tracks to instantly merge them into one track. Playlists are still updated accordingly.
Scan Settings
Scan type
Full library scan: This will scan your entire library and show all results, this can take a long time.
Selected playlist(s) scan: This will only scan the files in the selected playlist(s) and only show results from those playlists. This includes archived tracks if they are in those playlists.
Full library scan (playlists filtered): This will scan your entire library but only show results of which there is a track in any of your selected playlists. This includes archived tracks if they are in those playlists.
Tag search tolerance
You can reduce the duplicate scanner tolerance so it will find more results. The tolerance option only applies to the artist & title tag comparison. Audio fingerprinting is not affected by this setting.
The default tolerance is None which is the strictest/safest and has no chance for false positives.
The following tolerance options are available: None: Very strict. Artist and title must be a perfect match other than casing and special characters.
Low: Strict. Artist and title must be a near perfect match. Typos and minor differences can be seen as duplicates.
Medium: Less strict. Common title words such as "extended", "bootleg" are ignored. Many more common words are also ignored.
High: Not strict. Common title words are ignored and typo's and minor differences can be seen as duplicates. This is likely to result in some false positives.
Ignore Parentheses: Dangerous option! This will ignore anything in (parentheses) in your track titles so it is guaranteed to give you false positives. Use this if you want to go through your remixes and such. Highly advised to Lock All duplicates and only unlock what you are sure you want changed.
It's best to start with no tolerance and work your way up in multiple scans. On the High tolerance, be sure to check each result carefully.
Ignore folders
This setting allows you to choose folders on your hard drive that the duplicate scanner will ignore. Any track in any ignore folder or any of its subfolders will not be included in the scan.
Preselection
Lexicon intelligently pre-selects files in the result screen. It gives priority to higher bitrate tracks. If it is an exact audio match and a lower bitrate track has more cues than a higher bitrate track, then the higher bitrate track is chosen to keep but with the other cues and tags.
Play Count
Lexicon will combine the play counts of all the duplicate tracks and use that combined value as the play count for your track to keep.
MP4 (video) files
MP4 files that contain video are ignored in the duplicate scan. MP4 files that only contain audio are treated as normal audio files.
Re-importing in your DJ app
After you've used the scanner, your DJ app will still contain links to old files that no longer exist. A Full Sync to your DJ app solves this because a Full Sync also removes the old tracks.
All DJ apps
Make sure you do a Full Sync otherwise tracks deleted from your library are not removed from your DJ app database.
Rekordbox 5 (XML) only
These extra steps are only required if you use the Rekordbox XML sync method. If you use the Rekordbox 6/7 method, you should not do these steps.
Your playlists will not see the new paths until you delete and re-import the playlist. What you need to do is right click Playlists in the left menu in Rekordbox and select Delete all. This will remove all your playlists. You can then re-import your de-duplicated playlists by right clicking Playlists in the XML tab of Rekordbox and selecting Import playlist. All your playlists will be back and have now been updated with the correct paths to your tracks.
You can also delete your entire library before importing everything, then all old files will be gone too. However, you will need to re-analyze all your files so the former method is better.
Results
These options are available when scanning for duplicates or when choosing results.
You can right click tracks to play them or open the folder they are in.
Tag & cue merging
You can tell Lexicon to keep one file but use the cue points and tags of another file. You can do this by selecting the Use these tags & cues option on a duplicate in the result screen.
If the match was based on an artist/title combination (so not an exact audio signature match), you can still merge tags & cues but the cue points may not be in the exact right place. This is because the tracks may not be the exact same duration (sometimes silence is added to the start of audio files) and this can offset the cue point positions.
Tag & cue copying
You can tell Lexicon to copy all tags and cues from one track to all other duplicate tracks without deleting them. Do this by right clicking one of the tracks and choosing Use these tags & cues.
This is especially useful if you have multiple versions (e.g. MP3 and FLAC) of the same file and you want the same cues on all versions.
Tracks that have duplicates only in the same folder and without the same amount of cues are sorted to the top to make this process easier.
Lock/unlock all
This locks and unlocks all duplicates. Locked duplicates cannot be changed and will not be modified in any way. No tracks part of a set of duplicates will get archived when locked.
Prefer...
With the Prefer button, you can auto-select duplicates that meet certain criteria. This is very useful when you have many duplicates that you want to get rid of in bulk.
You can always choose to override locked tracks when preferring tracks, but be careful with this.
Inside (sub)folder
With this option, Lexicon will automatically select any track that occurs inside the chosen folder or any of its subfolders.
When you set a preferred path, Lexicon will give priority to original tracks, this means tracks that don't end with things like "Copy" or "(1)".
Example: you could tell Lexicon that you prefer paths that start with D:/audio which will auto select all duplicate results that start with that.
Highest bitrate
This will select the track from duplicates that has the highest bitrate.
Most cue points
This will select the track from duplicates that has the most cue points.
Most plays
This will select the track from duplicates that has the highest play count.
Title contains word
This will select the track where the title contains a certain word.
Extra 1 contains word
This will select the track where the Extra 1 field contains a certain word.
Extra 1 does not contain word
This will select the track where the Extra 1 field does not contain a certain word.
Streaming track
This will select the track that is a streaming track such as Beatport LINK, etc.
Local track
This will select the track that is a local (non-streaming) track.
Use highest tags & cues
With this option enabled, Lexicon will copy the tags and cue points from a track even if that track is not the preferred track. This can only happen when duplicates are exact audio matches. This allows you to keep tracks in a preferred folder even if that track did not have your cue points. They will be copied and the track in your preferred location will now also have the tags and cues of the archived track.
See Tag & cue copying above for more information.
Save unlocked to playlist
This option allows you to save all unlocked tracks that are found to a new playlist. This is useful if you want to manually check every duplicate. For example, if you modified the waveform with third party software and you want to make sure you know which is the nicer one.
Find Lost Tracks / Relocate
Find Lost Tracks / Relocate
You can relocate tracks by right clicking them or use Find Lost Tracks from the top menu bar under Utility
If you've moved files around or changed a folder name, your tracks will appear as missing. This can also happen if the volume name or drive letter changed, something that Windows and macOS sometimes do.
Lexicon solves this very common problem very effectively.
There are two ways to relocate your tracks. If you don't mind getting your hands dirty and know exactly what you are doing, the Find Lost Tracks utility is the more powerful but more difficult way. The easy way is to simply right click your missing tracks.
Easy: right click missing tracks
If a track is missing it will have an orange triangle next to it in the track browser. Right click it and you will notice the Relocate option.
One track
If you have selected one missing track, then Lexicon will allow you to relocate to any track of your choosing. If the chosen track already exists in Lexicon, then you can choose which you want to keep. The other track will be removed from Lexicon and replaced in all your playlists by the chosen track, so it won't break your playlists.
This also allows you to relocate a single streaming track to a file of your choice. See Transfer Streaming To Local for more information.
Multiple tracks
If you have selected multiple missing tracks, then Lexicon will let you choose a folder on your hard drive. Lexicon will search it for any matching filenames and automatically relocate those.
Advanced: Find Lost Tracks utility
For advanced users, you can use the Find Lost Tracks utility.
You have to select a source and target folder that will be updated for all tracks that match that folder.
You can choose if you only want to apply this to missing tracks or to all tracks, regardless if they are missing or not.
Find Lost Tracks is great if you know exactly what changed, for example if a drive letter changed. You'll know exactly what happened and there is nothing automatic going on.
You can only relocate to track locations that don't exist in Lexicon yet.
Changing file extension
You can select a new file extension. You should only use this if you changed from one filetype to another. For example, if you changed from WAV to MP3 and deleted the original WAV files, they will be missing in Lexicon. Set the new extension to MP3 and you can easily relocate them to the new MP3 locations.
Backup
You can let Lexicon automatically create a backup before changing your track locations. This is always recommended. If the tracks work as expected afterwards, you can delete the backup.
List missing files
To see all your missing files in the track browser, you can create a smartlist with the Is file missing rule.
If you've moved/renamed/deleted files outside Lexicon, you can restart Lexicon to force it to re-check if your files exist. Or if you open the Edit popup for a track, it will also force a re-check. Lexicon will re-check automatically every 5 minutes at most.
Find Tags & Album Art
Find Tags & Album Art
You can find tags & album art by right clicking tracks ➡ Track tools ➡ Find tags & album art
With the Find Tag & Album Art utility you can let Lexicon scan your tracks to find missing information. Lexicon will update the tags of your tracks to match the best release found.
Currently supports the following tags:
- Genre
- Year
- Label
- Album
- Album art image
- Energy
- Danceability
- Popularity
- Happiness
The album art image is downloaded and added to your music files.
Accuracy
Lexicon does its best to find the correct matching track but has to work with your existing artist and title tags. If these are not clean then it will be harder to find the correct, or any, match. You can use Smart Fixes to clean your tags.
Data source
Lexicon uses SonoVault for most information and Spotify for the Energy, Danceability, Popularity and Happiness.
Lexicon can also analyze your tracks for Energy, which is a different analyzer than what Spotify uses so will give different results. Which to use is up to your preference.
Original release
If you enable this option, Lexicon will strip away any remix text from your track titles and search for the original version.
Album art
To display your album art, you may need to reload tags in the DJ app you use.
Rekordbox WAV files: keep in mind that Rekordbox does not support album art on WAV files so even reloading tags in Rekordbox will not work for it.
Genre & Custom Tags
If you enable Genre, you can also let Lexicon write Custom Tags with main genre and subgenre to your tracks.
The genre field is always only filled with the main genre (e.g. House, Rock, Pop). Subgenres go to Custom Tags either accompanied by their main genre, only their first subgenre or something else depending on what option you choose there.
You can let Lexicon automatically add genre custom tags by enabling the settings there. This can also be toggled in the global Lexicon settings.
Best practice
For older tracks that may be re-released (either as remix on Beatport or remaster/compilation on the other platforms), you can enable the above mentioned Original release option to ensure you will get the oldest known information (such as Year) for those tracks.
Find Unused Files
Find Unused Files
You can find the unused file scanner in the top menu bar under Utility
With Find Unused Files you can scan a folder of your choice and display all files in that folder and all subfolders that are not in your Lexicon library. This is a really easy way to get rid of files you don't use and can save you tons of space.
You should select the parent folder that contains all your music.
Make sure you review the results of the scan since it may contain files you don't want to throw away. There's no way to undo after you delete so make sure you have a backup.
File extensions
By default, it will scan for all file extensions. But you may want to restrict this to only audio files or exclude all audio files. Just select Include or Exclude and enter the file extensions you want to keep.
Example: You might want to delete all images in your music folder. Select Include and add image extensions such as PNG, JPG, JPEG and BMP.
Special folders
Some common DJ folders are filtered and are not scanned. These are the following: _Serato_, Traktor, PioneerDJ, iTunes, Engine Library and Lexicon in your Music folder.
Certain Windows and macOS system folders are also ignored.
Text report
After deleting your files (if you chose to do so), a report is generated in the Documents/Lexicon folder. This report contains a list of all files that were deleted.
You can also save the scanned file paths as a text file without deleting anything. This can be very useful if you want to use these file paths in a different program or write your own script to handle these files.
Genre Cleanup
Genre Cleanup
You can find the Genre Cleanup in the sidebar menu under Quick Fixes
The Genre Cleanup scans your entire library for every unique genre. You can then select the genres you wish to rename and very quickly create order in your genres.
This is especially useful when you're using Mixable Tracks where you can choose to stay within a certain genre. Or if you just want a nice and tidy library.
You can use SHIFT+Click on any genre to auto-fill that genre as new genre.
You can select all unlocked genres with CTRL/CMD+A and unselect all with Escape.
You can filter on a genre in the track browser by ALT+Click or OPTION+Click any genre. This works really well when you have the Sidepanel open.
Locking genres
You can right-click on any genre to lock that genre so you can no longer change it in the genre cleanup.
Import to tags
You can import all your genres to tags. Lexicon will create a tag for each genre found in your library and apply it to each track that had that genre. You can safely re-run this each time you add new tracks to your library to keep your genre tags up to date.
Important: Only use this after you clean up your genres or you may import a mess of genres into your tags.
History
History
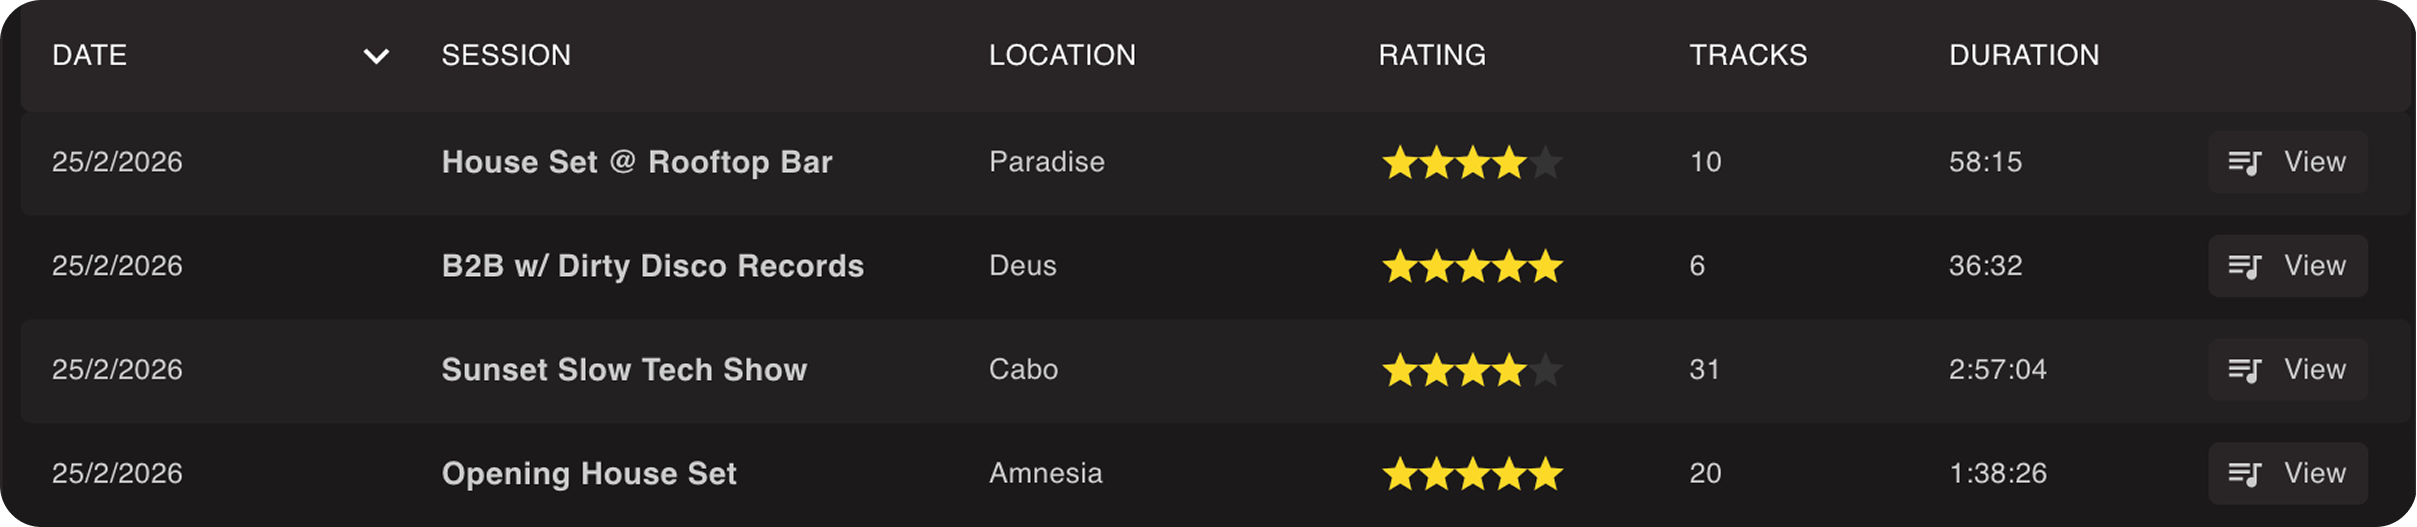
Lexicon shows all the history of your DJ app in one convenient place. You can reach History from the sidebar.
Metadata
You can add a rating and location to each history set to keep track of them.
Snapshot
Lexicon makes a snapshot of your tracks for the history sets. This means that the information for those tracks is de-coupled from your library, so updating a track in your library will not update it in the history. So your history is a true historic snapshot of when the tracks were played.
Using history
You can save a history set as regular playlist to work on it further. Since original tracks may have been deleted, Lexicon intelligently matches your tracks by filename and location with a priority system for best matches. This does mean it relies on the filename of the history track and your current tracks to still be the same.
You can also copy a full history set to your clipboard.
Automatically imported
History is automatically imported from any DJ app (except Engine currently) when you run an import from that DJ app. It doesn't matter if you do a full or playlist import, it always pulls in all history sets. History sets are not duplicated when importing.
Note: Engine DJ history coming soon.
Deleting history
Since DJ apps sometimes have bad history or from practice sessions, you can delete history sets easily. Lexicon remembers what you have deleted so when importing from your DJ app, it will not import those deleted history sets again.
You can also delete individual tracks from any history set.
Mixable Tracks
Mixable Tracks
You can find Mixable Tracks by right clicking tracks ➡ Track tools ➡ Find mixable tracks
The Mixable Tracks feature is the successor of Similar Tracks in Rekordcloud. With this feature you can choose any track and Lexicon will give you a list of tracks that are mixable with the chosen track. The better organized your library, the more powerful this feature will become.
Usage
You can open the popup by right clicking any track and choosing Track tools ➡ Find mixable tracks.
This will present you with a popup with some basic settings. By default, Lexicon only takes key and BPM into consideration. This can already give you some interesting mixable tracks.
The real power comes when you start using the mix rules where you can choose exactly what the resulting tracks should look like.
Next track
Mixable Tracks can be used during a performance. Once you find the track you want to mix, play it on your favorite DJ app while also selecting it in Lexicon. Click the Use as next track button to generate a new list based on that track. Keep doing that while you're mixing and Lexicon stays with you.
Organization
This feature becomes much more powerful with a well organized library. Adding proper tags, ratings, colors, genres or danceability will help tremendously here.
For best results, try to create a good organizational system. For example, you might use rating to indicate how mellow or aggressive a track is. This way, you can use the rating mix rule and only get a certain type of track. The same goes for other mix rules, like color, genre, danceability, energy and popularity. For most control, you can consider using custom tags to define every aspect of a track.
Options
By default, Lexicon only shows the basic options that should work for most libraries since BPM and Key is usually known. When you switch to advanced options, you will get far more choice.
| Option | Explanation |
|---|---|
| BPM range | The allowed BPM difference |
| Match key | Match the current key or compatible key, this follows your Key Mixing Mode setting |
| Match color | Match the current color exactly |
| Recently added | When the track was added to Lexicon |
| Must have cue points | Only consider tracks that have cue points |
| Include half/double BPM | Include tracks that are half or double the input track BPM |
| Genre(s) | Only consider tracks with one of these genres |
| Year | Only consider tracks that match the input track year or fall within the given range |
| Energy | Only consider tracks that match the input track energy by one difference or fall within the given range |
| Popularity | Only consider tracks that match the input track popularity by one difference or fall within the given range |
| Rating | Only consider tracks that match the input track rating by one difference or fall within the given range |
| Danceability | Only consider tracks that match the input track danceability by one difference or fall within the given range |
| Happiness | Only consider tracks that match the input track happiness by one difference or fall within the given range |
| Must have tag | Only consider tracks that have one of these custom tags |
| Must not have tag | Tracks with any of these custom tags will not be considered |
Templates
You can save your settings to a template so you can re-use it later.
Moving & Renaming Files
Moving & Renaming Files
There are two ways to move and rename files in Lexicon.
Both methods keep your tracks working in Lexicon and your playlists intact. After moving files, it is important to Full Sync to your DJ app. A Full Sync is required because it clears the old tracks with old location whereas a partial sync would not clear them.
Quick move
To quickly move tracks to a new folder and optionally rename them based on their tags, simply right click one or more tracks ➡ Send to ➡ Move files.
All you have to do is choose a folder and Lexicon does the rest. After doing this once, Lexicon remembers the most recently used folders that you can favorite.
Using hotkeys can really speed up this process as favorited folders will have a hotkey from 1-9 there. You can also set a hotkey in the settings to open the Move Files popup.
Target Folder & Rename Patterns
This is the advanced method with more control and the ability to designate subfolder patterns giving you a multi-folder structure based on your tracks tags. For more information see this manual page.
Music Player
Cue Points
Once you load a track into the music player, you can add or delete cue points.
You can right click a cue point to set a color, name and change it to a loop.
Delete a cue point by right clicking it or by CTRL/CMD clicking it.
By default, the following hotkeys are available:
1: Set or play cue 1
2: Set or play cue 2
etc
CTRL/CMD+1: Delete cue 1
CTRL/CMD+2: Delete cue 2
etc
You can change these hotkeys in the settings.
Loops
You can turn any cue into a loop by right clicking it and setting a loop duration.
A loop can be turned into an active loop by enabling the Active checkbox. An active loop will automatically engage when the play head reaches it. Active loops are sent to DJ apps that support it. Only Rekordbox, Engine, VirtualDJ and Djay Pro support active loops.
When using Lexicon as a music player, it makes sense for active loops not to trigger automatically. You can turn off active loops globally in the music player in the top left of Lexicon.
Quantize
You can enable quantize to make your cue points snap to the beatgrid. Quantize can be enabled from the Edit menu, or by pressing the "Quantize" button in the music player.
The Q hotkey also toggles quantize by default.
Dragging Cues
You can drag cue points to re-arrange them.
Moving Cues
You can move a cue to a new position in the track by holding the SHIFT button and clicking a cue. The cue will be set at the current track position.
Cue Templates
You can set up cue templates so you don't need to enter the same name and color each time.
To create a cue template, first right click an existing cue and click the arrow button in the bottom right of the cue popup. Click any empty line to create a template from your current cue point. If you want to update a template, just delete it and then re-create it.
To use a cue template, all you need to do is open the popup and click an existing cue template. That template will be applied to your current cue point. You can quickly do this by pressing the cue buttons (see the default keys above). Hotkeys are enabled for the first 8 cue templates.
You can add an unlimited number of cue templates. Once all your templates are full, a new empty template is created at the bottom.
To directly apply a cue template to a cue point, you can set up a hotkey for each cue template. If the music player is exactly on top of a cue point and you press the hotkey, that cue template will be applied to that cue point.
Beatgrid
After loading a track into the music player, you can edit the beatgrid by clicking the Edit Grid button on the right side of the music player.
If you find that your BPM is doubled or half of what it should be, you can use the buttons to half/double the BPM.
Analysis
If a track does not yet have a beatgrid, Lexicon will analyze the track and create one automatically.
You can also right click tracks and choose Analyze to analyze many tracks at the same time. See Analyzer
Quantize
When Quantize is enabled, moving the beatgrid will move cue points with them if they were already synced to the beatgrid. Cue points that are not exactly on the beatgrid will not be changed.
Beat Jump
After loading a track into the music player, you can beat jump to quickly go through a track.
You can find the beat jump controls at the left side of the music player under jump.
Beat jump works best if you add hotkey controls to them, you can do that in the settings.
By default, you can use the following hotkeys:
CTRL+ARROW LEFT: Jump backward 16 beats
CTRL+ARROW RIGHT: Jump forward 16 beats
Queue
You can add tracks to a temporary queue that will continue autoplaying when the current track has finished.
This is ideal if you want to listen to your music while doing something else.
You can add tracks to the queue by right clicking tracks and select Add to queue. You can also drag tracks directly on the existing queue.
Right click tracks in the queue to delete or play them immediately. Or if you want to find that track in your collection, you can choose View.
Options
You can shuffle or clear the play queue by going into the Edit menu at the top and choose Shuffle Queue or Clear Queue
Hotkeys (Keyboard Shortcuts)
The music player is intended to be your primary music player, connected directly to your DJ library.
There are hotkeys for almost anything, you can change these in the settings.
By default, the following hotkeys are available:
SPACE: Play/pause
Z: Previous track in queue
X: Next track in queue
C: Cue
There are many more hotkeys, you can set them up in the settings.
You can also display hotkeys inside Lexicon whenever they are available by turning the Show keyboard shortcuts setting on.
Global Hotkeys
You can change hotkeys to be global (system wide) so they work anywhere, even if you can't see Lexicon. This is perfect to listen to your music while doing something else. You can even beat jump without seeing the track, perfect to go through tracks quickly.
Global hotkeys do not perform their original function anymore, so it's best to set up global hotkeys with modifiers that you don't use often.
Mouse shortcuts
You can double-click on the waveform to go there. This makes setting cues easier than dragging a waveform to that position.
You can SHIFT click on a cue to move that cue to the current (quantized) position.
You can CTRL click to delete a cue.
You can hold the SHIFT button to drag the waveform extra slow. This is useful if you need that extra precision.
Playlists
Playlists

To find your playlists in Lexicon, first press the Show Playlists button in the bottom right.
If you've imported from a DJ app, you'll find your playlists here.
If you don't have any playlists yet, create your first by right clicking Playlists at the top.
Selected Tracks
If you have tracks selected that you want to add to a new playlist, you can do that without losing your selection. Right click the Playlists header above all your playlists and choose the New playlist & add tracks option.
Share
You can share your playlists in a few ways, see Share.
Playlist Tools
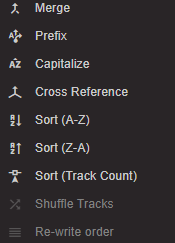
Lexicon has many useful tools to manage your playlists. More on them under Playlist Tools in the manual sidebar.
Tracks In Playlists
You can drag tracks from one playlist to another by dragging them over the playlist tree on the left. You can also drag files from your computer directly into a playlist, this will add them to your library if they weren't added already and add them to a playlist. If the tracks are already in your library, they will not be added again but they will get added to your playlist.
You can also favorite a playlist and drag your tracks over there, see Favorite Playlists.
Playlists From Filesystem
By dragging a folder from your computer or an M3U(8) file on top of your playlist tree, it will automatically turn that into one or more playlists.
If you drag a folder with subfolders, then Lexicon will turn that into the same playlist folder structure.
Favorite Playlists
You can favorite any playlist by right clicking it
You can set any number of your playlists as favorite. This will make your favorite playlists appear above the track browser:

You can drag tracks over your favorite playlists just like your normal playlists.
Hotkeys

A powerful way to use favorite playlists is to set up hotkeys for them. You can instantly jump to that playlist or add any selected track to your playlists. This makes working with your most important playlists a breeze.
Smartlists
Smart playlists are an essential tool to organize your DJ library. These have different names; Intelligent Playlists, Smartlists, Filter Folders, Smart Crates and more. In Lexicon they are called Smartlists.
You can create a smartlist by right clicking any playlist to add a new playlist or smartlist there.
Rules
You can set any number of rules, there is no limit.
The contents of your smartlist are based on the rules. If you add new tracks to your library, they get added to the smartlist automatically, if they match the rules.
You can select Any Rule or All Rules to decide if the tracks in your library should match any of the rules or all of them.
Archived tracks are not visible in your smartlists unless you add a rule to show them.
OR Rules
You can link rules together with an OR clause to create smartlists with more flexibility. The OR clause only works if your smartlist is set to "All Rules".

This allows you to create smartlists like these: (Genre = "House" OR Genre = "Techno) AND (Rating = 3).
Importing
Smartlists are imported from the DJ apps automatically.
Smartlists can only be imported during a Full Import. The reason is that a smartlist has no actual track list so during a partial import there is no way to know which tracks belong to that smartlist.
DJ App Limitations
Rekordbox 5 does not support intelligent playlists through the XML. Getting your intelligent playlists in and out of Rekordbox 5 is not possible. Lexicon smartlists are converted to normal playlists when syncing to Rekordbox 5.
Rekordbox 6/7 only supports 2 MyTag smartlist rules, see below.
Not all DJ apps support all smartlist rules, so smartlists may be converted to normal playlists on sync, see below.

The smartlist editor has an indicator that displays if the current smartlist is compatible with each DJ app
Conversion
Lexicon lets you convert your smart playlists from one DJ app to another. Almost all rules are supported in Lexicon but not every DJ app supports every rule. Most basic rules (e.g. number equals, text contains) will convert as expected. If a rule does not exist in a DJ app then the smartlist will be converted to a normal playlist in the DJ app. This way, you will still keep the right tracks inside that playlist even if that rule doesn't exist.
Lexicon tag rules are converted to Rekordbox 6/7 MyTag rules. The only Lexicon rules that are supported here are Has all these tags and Has none of these tags. These are mapped in Rekordbox 6/7 to contains and does not contain.
Performance
Because smartlists are dynamic, their contents are updated each time you select a smartlist. The bigger the library, the longer this takes. This only happens once every 30 seconds at most, so you can keep switching between smartlists without it taking time to load every time. This does mean that if you added a track to your library, it may take up to 30 seconds before it appears in the smartlist. You'll see the smartlist loading to indicate that it has updated.
Playlist Tools
Playlist Merge
Select any number of playlists and right click and select Tools ➡ Merge to combine multiple playlists into one new playlist.
All tracks from all selected playlists will be combined into one new playlist. Any duplicates will be dropped from the new merged playlist.
Playlist Sort
Select any number of playlists and you can sort them by right clicking and selecting Tools ➡ Sort. The playlists will be sorted in their current position.
This does not sort tracks within the playlists.
There are several sort methods:
Sort (A-Z)
Sorts playlists alphabetically.
Sort (Z-A)
Sort playlists reverse alphabetically.
Sort (Track Count)
Sort playlists by the number of tracks inside each playlist.
Manual Sorting Tracks
You can sort tracks inside playlists by drag & dropping them. This only works if the playlist is "unsorted". This means that the header must not have any arrow indicating a sort direction. Click a header until the arrow disappears, then the playlist is in the original order and drag & drop is enabled.
Playlist Cross Reference
Select any number of playlists, right click and select Tools ➡ Cross Reference to find out which tracks multiple playlists have in common.
You can find out which tracks both playlists have (e.g. you might want to know which tracks are in both your "House" playlist and in your "Top 100" playlist).
You can also find out which tracks are missing from the selected playlists. This will cross reference the selected playlists with the entire library and create a new playlist with any track that is not found in the selected playlists. Be careful as this may create a very large playlist.
Prefix Playlists
Select any number of playlists, right click and select Tools ➡ Prefix to add text before each playlist name.
Text
Choose the text option to add text before each playlist name.
Number
Choose the number option to add an increasing number before each playlist. You can tell Lexicon to remove an existing number prefix so it will be replaced by the new number.
You can add a leading zero for better sorting.
Rewrite Order
This playlist tool lets you change the internal order of a playlist. This has no useful effect inside Lexicon but can be very useful when syncing to a DJ app.
Some DJ apps don't support sorting by multiple columns or you may want to view a playlist on DJ hardware like Pioneer or Denon gear. They may support sorting a playlist but only by a select few columns. Sorting by columns like Energy or Danceability is not possible there at all since they do not know about those.
This is where rewrite comes in, you can sort your playlist by the Energy column in Lexicon and then rewrite the order. Now this is the "original" order so if you load this playlist elsewhere, it will be in this same order.
Plugins
Plugins
Plugin documentation for developers: see this page
Lexicon supports plugins. Plugins are made by developers with Javascript and allow you to change your tracks and playlists in almost any way. Plugins can also control and automate parts of Lexicon.
Where to get them?
Developers are encouraged to share their plugins on the forum.
If you have questions about plugins, the best place to ask is on our Discord in the #developers channel.
How to install a plugin?
Plugins are loaded automatically when a plugin ZIP file is detected in the Documents/Lexicon/Plugins folder.
After a Lexicon restart, you can run plugins from the top menu bar ➡ Plugins.
Hotkeys
A hotkey can be assigned to each hotkey action. You can set these up in the Hotkeys section in the Lexicon settings.
Share
Share
To share or export your tracks to a file, right click a playlist and choose Share.
Don't confuse this with Sync: Sync lets you update your DJ apps so they are the same as Lexicon.
You have the following ways of sharing playlists:
Quick Copy
Copies the track title and artists directly to your clipboard.
Quick Copy (With Numbers)
The same as Quick Copy but adds a line number in front of each line.
Save As File
You can export your tracks to the following file types:
- CSV
- M3U
- HTML / PDF
CSV
The CSV file will have all the tracks and columns you selected earlier in that order.
M3U
The M3U file is a list of track paths and their artist and title in the extended M3U information.
HTML / PDF
You can download your selection as a plain HTML file. This is mostly useful if you want to print your tracks.
The HTML is a printer friendly file. To print it, just open the HTML file in your browser and print it.
You can save the file as PDF by selecting the Save to PDF option after pressing Print.
Re-ordering your selection
You can change which columns are exported by right clicking the column header. You can drag to change the order of the columns.
You can sort columns by clicking on the column header and by holding CMD or CTRL you can sort by multiple columns. For example, you could sort by Key and then BPM.
You can quickly select multiple tracks by holding the SHIFT button.
Send To
You can send your tracks to a Spotify, Tidal or Beatport playlist. This does not upload your tracks but matches them to the corresponding tracks on Spotify. Lexicon will try its best to find the correct tracks and add them to a new playlist. Some tracks may not be found. Lexicon will create a report where you can find out which tracks could not be found.
It really helps to have clean track titles when sending tracks to Spotify, so consider using Smart Fixes to clean them.
Sidepanel
Sidepanel
Lexicon has a second track browser called the Sidepanel. You can open it from the top menu bar ➡ View ➡ Toggle Sidepanel.
The sidepanel lets you view a second list of tracks or playlist at the same time. This is especially useful when going through an older playlist to cherry pick tracks and dragging them into the new playlist.
Availability
The sidepanel is not available on some screens and it will automatically disappear. It will automatically re-appear when navigating to a screen that does support it.
Playlists
To open a playlist in the sidepanel, right click any playlist and choose Open in sidepanel.
To view all tracks in the sidepanel, either toggle it twice or right click the top most playlist folder called Playlists and select Open in sidepanel.
Hotkey
Holding the ALT button while clicking any playlist will open it in the Sidepanel, if the Sidepanel is visible.
Smart Fixes
Remove Number Prefix
This removes number prefixes from titles such as 01. Get Lucky or (01) Get Lucky and turns it into Get Lucky.
Fix Casing
This turns text from tracks with either ALL UPPERCASE or all lowercase into All Uppercase and All Lowercase.
You can run this smartfix on any field such as title, artist, etc.
Remove URLs
This detects and removes URLs (website links) from any field and keeps the rest of the field intact. This is super useful for track titles or comment fields that have a URL in them.
If you want to completely empty the field if it contains a URL, enable the Delete all text option.
Fix Encoded Characters
You might see some encoded characters in your tracks like &. This smart fix quickly turns those into the characters they are actually meant to be.
Extract Remixer
Rekordbox, Traktor, VirtualDJ, Serato and Engine DJ have Remixer tags but they are almost never used. With this smart fix you can extract the remixer from a title and fill the Remixer tag.
A title like At Night (Purple Disco Machine Extended Remix) will have Purple Disco Machine set in the Remixer tag.
If you have titles without remix parenthesis, e.g. Divide & Conquer - Noisia Remix then you should use the Add re(mix) parenthesis smart fix first.
Special words like Extended, Dance, Club will be filtered out.
The track title is never changed when extracting a remixer.
Add (Re)mix Parenthesis
To keep your track titles uniform, you can use this smart fix to add parenthesis to your remixed titles that don't have parenthesis.
A title like Green Bottle - Original Mix will be turned into Green Bottle (Original Mix).
Remove Garbage Characters
This removes certain unwanted characters from your titles such as:
- Multiple spaces in a row
- Leading and trailing spaces
- Leading and trailing special characters such as these: ] | -
You can run this smartfix on any field such as title, artist, etc.
Replace Characters With Space
This can replace any character you want with a space. If you have tracks with titles like Dark_Side_of_my_Room it can quickly turn it into Dark Side of my Room.
Extract Artist From Title
Sometimes you have tracks without MP3 tags that can result in tracks with titles like Daft Punk - Touch and no artist name at all.
With this you can quickly fix these tracks.
There are two options you can set here:
Separator
By default your title will be split on - which would turn the above example into artist Daft Punk with title Touch. Choose the most suitable separator for your tracks. You can perform this action as often as you'd like so just do all your tracks in a few turns.
Result Number
If your old title is Daft Punk - Touch then you will want Daft Punk as artist, which is the first result. Result number should be set at 1 for this.
If your old title is in a different form, e.g. Touch - Daft Punk then you will want your result number to be set at 2.
This works for any number of results, so if your old title is 07 - Touch - Daft Punk then you will want to set result number to 3.
Remove Common Text
This smart fix lets you quickly remove common text from your tracks, usually your titles.
Remove Camelot key from title
If your tracks have the Camelot key in them and you want to easily remove them, this is the right smart fix.
This will change the following track titles:
10A - Get Lucky ➡ Get Lucky
Get Lucky - 10A ➡ Get Lucky
Remove (Original Mix) from title
You might not want the "Original Mix" text in your titles so with this smart fix you can instantly fix that.
This will change the following track titles:
Get Lucky (Original Mix) ➡ Get Lucky
Get Lucky - Original Mix ➡ Get Lucky
Smartlists
Smartlists
Smart playlists are an essential tool to organize your DJ library. These have different names; Intelligent Playlists, Smartlists, Filter Folders, Smart Crates and more. In Lexicon they are called Smartlists.
You can create a smartlist by right clicking any playlist to add a new playlist or smartlist there.
Rules
You can set any number of rules, there is no limit.
The contents of your smartlist are based on the rules. If you add new tracks to your library, they get added to the smartlist automatically, if they match the rules.
You can select Any Rule or All Rules to decide if the tracks in your library should match any of the rules or all of them.
Archived tracks are not visible in your smartlists unless you add a rule to show them.
OR Rules
You can link rules together with an OR clause to create smartlists with more flexibility. The OR clause only works if your smartlist is set to "All Rules".
This allows you to create smartlists like these: (Genre = "House" OR Genre = "Techno) AND (Rating = 3).
Importing
Smartlists are imported from the DJ apps automatically.
Smartlists can only be imported during a Full Import. The reason is that a smartlist has no actual track list so during a partial import there is no way to know which tracks belong to that smartlist.
DJ App Limitations
Rekordbox 5 does not support intelligent playlists through the XML. Getting your intelligent playlists in and out of Rekordbox 5 is not possible. Lexicon smartlists are converted to normal playlists when syncing to Rekordbox 5.
Rekordbox 6/7 only supports 2 MyTag smartlist rules, see below.
Not all DJ apps support all smartlist rules, so smartlists may be converted to normal playlists on sync, see below.
The smartlist editor has an indicator that displays if the current smartlist is compatible with each DJ app
Conversion
Lexicon lets you convert your smart playlists from one DJ app to another. Almost all rules are supported in Lexicon but not every DJ app supports every rule. Most basic rules (e.g. number equals, text contains) will convert as expected. If a rule does not exist in a DJ app then the smartlist will be converted to a normal playlist in the DJ app. This way, you will still keep the right tracks inside that playlist even if that rule doesn't exist.
Lexicon tag rules are converted to Rekordbox 6/7 MyTag rules. The only Lexicon rules that are supported here are Has all these tags and Has none of these tags. These are mapped in Rekordbox 6/7 to contains and does not contain.
Performance
Because smartlists are dynamic, their contents are updated each time you select a smartlist. The bigger the library, the longer this takes. This only happens once every 30 seconds at most, so you can keep switching between smartlists without it taking time to load every time. This does mean that if you added a track to your library, it may take up to 30 seconds before it appears in the smartlist. You'll see the smartlist loading to indicate that it has updated.
Store Links
Store Links
You can find Store Links in the left sidebar menu
With the Store Links feature you can quickly find pages where you buy tracks that you're looking for.
Currently searched on the following online stores:
- Beatport
- Apple Music (iTunes)
- Bandcamp
- Traxsource
You can load a Spotify or Tidal playlist or anything else from the Track Matcher and load it into Store Links from there. You can use any of the Charts by selecting one and loading the chart into Store Links.
Lexicon will do the boring and slow search process on multiple websites for you automatically.
Searching these stores is a slow process, roughly about 5 seconds per track. Results will be added as they come in.
Speed
Searching online stores takes time. Searches are executed in parallel to optimize the time it takes to get results. To speed up the results, turn off stores you don't use.
Prices
Lexicon shows the prices for each track so you can make an informed decision where to buy your tracks. Prices are only shown for stores that make this information publicly available.
You can let Lexicon convert the currency of the prices automatically. You can change this in the settings on the Store Links page.
Note: Lexicon is not affiliated with any of the available stores and any price you see only exists to give you an indication. Lexicon cannot be held responsible if any information in the Store Links results (such as price) is inaccurate.
Tracks
Track Browser
The track browser is your main Lexicon screen where you can view and edit all your tracks. Click any field twice to edit it.
Editing in more detail or with Recipes can be done by right clicking any track and choosing Edit.
Keyboard Controls
Tab: Jump to the next field of the current track
Cmd or Ctrl + Home: Jump to the first field of the current track
Cmd or Ctrl + End: Jump to the last field of the current track
Cmd or Ctrl + Arrow Up: Jump to the same field of the track above
Cmd or Ctrl + Arrow Down: Jump to the same field of the track below
Visible Columns
You can enable more visible columns by right clicking any column header.
Track Previews
You can show a waveform preview for each track. These previews are clickable and will play the track instantly, by default for 10 seconds. You can change this in the settings. Pressing the ESC button will also stop the preview.
Waveform previews are generated automatically when you play a track or when you analyze them with the "Waveform" checkbox enabled. If you change your waveform colors in the settings, you will notice your waveform previews do not change. You need to re-analyze them for those to update.
You can safely run the waveform analysis on your entire library, it will only add or update waveforms if they are missing or if you changed the colors.
Compatible Key
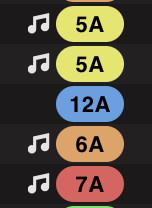
When a track is loaded in the music player, Lexicon will display harmonically compatible keys in the track browser with a white music symbol.
You can change how the compatible key is calculated in the Lexicon settings. You can choose the following:
Harmonically Compatible ➡ Traditional harmonic mixing rules, e.g. 10m ➡ 11m or 10m ➡ 10d, etc.
Fuzzy Key Mixing ➡ Expanded compatibility based on adjacent open key numbers, e.g. 10m ➡ 9m/9d or 10m ➡ 11m/11d, etc.
Searching
To search in the track browser, hover your mouse over one of the column headers, e.g. TITLE. This way you can search in every column, or multiple columns at a time. Searching ignores accents and capitalization.
You can use the special keyword None in any filter to find tracks that do not have a value for that field.
In number fields like BPM or Energy you have a few extra options:
| Operator | Example | Notes |
|---|---|---|
> |
> 150 |
Greater than |
< |
< 150 |
Smaller than |
>= |
>= 150 |
Greater than or equals |
<= |
<= 150 |
Smaller than or equals |
- |
120-150 |
Between |
! |
!150 |
Not |
Searching Keys
Keys are automatically converted when you search. For example, when you search for 4M, it will show tracks that have the key Am since these two keys are the same but in a different format.
Searching Dates
You can search in date fields (like Last Played) by using the YYYY-MM-DD format, for example: 2022-04-10.
You can also use the > and < operators here (see above table).
Searching Custom Tags
You can only search for full custom tag labels. Any partial match will not give any results. This is for performance reasons to make sure the track browser is always very fast.
You can start your search with a tilde ~ to make all tags required instead of just one tag.
Examples:
Techno, House ➡ this will match any track that has Techno OR House
~House, Vocals ➡ this will match any track that has both House AND Vocals
You can start each custom tag word with an exclamation mark ! to negate it, so that custom tag must not be on the track.
Examples:
!Techno ➡ this will match all tracks WITHOUT Techno
!Techno, !House ➡ this will match all WITHOUT Techno OR WITHOUT House
You can even combine them, here are some complex examples:
~Techno, !Vocals ➡ this will match any track WITH Techno but must NOT have Vocals
~!Techno, !Vocals ➡ this will match any track WITHOUT Techno AND WITHOUT Vocals
Sorting
You can sort by any column by clicking the drag handle when you hover over a column header.
Sorting by the # column will put your playlist in the original order.
Custom Tag Sorting
Custom Tags are sorted by amount of custom tags that each track has.
Track Timeline

When you have a playlist selected, you will see the Track Timeline above the track browser. This gives you an overview of the flow of your playlist. It can display the following information:
- Key and Key Compatibility
- BPM
- Rating
- Energy
- Danceability
- Popularity
- Happiness
You can customize what information is shown by clicking the small Customize button in the bottom right corner of the track timeline.
You can always show or hide the Track Timeline from the View menu at the top.
Key compatibility
Bar color mode
You can change the colors of the bars. By default it will be on Key and show the key color, the same color as keys in your track browser.
The other coloring option is BPM change; this will color a bar green if the BPM goes up compared to the track before it or red when it goes down. If BPM stays the same, the bar will be grey.
Large playlists
You can hide the track timeline for large playlists since you probably won't be using it for large collections that are not intended to be set lists. You can still show it through the View menu at the top but the timeline will cut off if there are more tracks than can fit on the screen.
History
The Track Timeline also appears for your history sets when viewed through the History page from the sidebar.
Streaming Tracks
Lexicon has partial support for streaming tracks from the following streaming sources:
- Beatport
- Beatsource
- Tidal
- SoundCloud
Partial Support
Check each source below to see what they can and cannot do in Lexicon.
Converting streaming tracks between DJ apps is fully supported for all streaming sources.
Copy Pasting Links
You can paste (CMD or CTRL+V) website links for streaming tracks into Lexicon to add them. You can get these links like this:
Beatport: use the link of the website page for a track or release (see examples below)
Tidal: right click any track and copy the link
SoundCloud: use the link of the website page for a track or release (see examples below)
Beatport
Beatport has its own integration in Lexicon. You can browse the entire Beatport catalog and add any streaming track to your library by dragging it into a playlist. Beatport tracks can only be previewed, the full track cannot be streamed yet. This also means you cannot set cues or beatgrids yet, since the entire track is needed for that.
You can also paste Beatport website links for tracks and releases into the Lexicon track browser to add them to your library. The links look something like this:
- https://www.beatport.com/track/chaos-theory/4283842
- https://www.beatport.com/release/universus/1067503
Beatsource
Beatsource tracks cannot be played yet, so no cues or beatgrids can be set yet either.
Tidal
Tidal tracks cannot be played yet, so no cues or beatgrids can be set yet either.
You can paste Tidal links for tracks into the Lexicon track browser to add them to your library. The links look something like this:
SoundCloud
SoundCloud tracks can be fully played in Lexicon. You can set cues and beatgrids for them and add them to playlists just like any track.
You can also paste SoundCloud website links for tracks into the Lexicon track browser to add them to your library. The links look something like this:
Manual Editing
Fields can be quick edited by clicking it twice in the track browser, see this page
You can select any number of tracks and open the track editor to edit tags.
If you have selected multiple tracks, you will see <multiple values> in some fields. These are fields where not all tracks have the same value. If you change this, the new value will be set to all tracks on that field.
If you need more dynamic editing of many tracks at the same time, try using Recipes.
By default, the following hotkeys are available:
E: Open editor from the track list
In the editor popup:
Left Arrow and Right Arrow: Navigate to the next track, if only one was selected. This will automatically save any changes.
Tab: Change between the manual editor and the recipes page.
Enter: When editing a field, press Enter to save and close the popup.
Escape: Close the editor popup, discarding any changes.
Album Art
You can replace and remove album art for as many tracks as you want. You can do this from the Album art button in the editor popup.
You can also Reload album art. This is useful if you've changed the album art outside Lexicon and you want to update the previews in the track browser.
Recipes
You can find Recipes by selecting one or more tracks ➡ right click ➡ Edit ➡ Recipes
With Recipes, you can dynamically update many tracks at a time.
Recipes are executed on each selected track individually.
Casing Recipes
To Upper Case
Changes the text of the selected field to all uppercase characters.
- Field: The field to change
- Words to ignore: List of words to skip during change
To Lower Case
Changes a field to lowercase. You can exclude certain words so they won't be changed.
- Field: The field to change
- Words to ignore: List of words to skip during change
To Title Case
Changes a field to title case. You can exclude certain words so they won't be changed.
- Field: The field to change
- Words to ignore: List of words to skip during change
To Sentence Case
Changes a field to sentence case where only the first word of a sentence has a capital letter.
- Field: The field to change
Cue Point Recipes
Delete Cue Points
Deletes all cue points from the selected tracks depending on the chosen setting.
- Options: Delete cues & loops, Delete first cue, Delete last cue, Keep first cue, Keep last cue, Delete loops, Delete without color, Delete without text, Delete memory cues
Change Cue Colors
Changes all cue colors of the selected tracks to one of the color patterns. See the Lexicon app settings for an example of the color patterns.
Random will simply give you random colors on each cue without using the same color twice.
First cue color will set all cue colors to the color of the first cue point. Use this if you want one specific color.
- Color schemes: Basic, Grayscale, Cold, Warm, Random, No colors, First cue color
Find & Replace Cues
Finds & replaces cue color and text with new color and text for all matching cue points and loops. Empty Match Text matches cues without text. An asterisk (*) as Match Text matches any text. Empty Match Color matches cues without a color.
- Match color: Color to find
- Match text: Text to find
- New color: Replacement color (leave empty to keep existing)
- New text: Replacement text (leave empty to keep existing)
Change Active Loops
Changes or removes active loops.
- Options: Turn last loop into active loop, Turn first loop into active loop, Turn last cue into active loop, Turn first cue into active loop, Turn all loops into active loops, Turn all active loops into loops
- New loop size: Number of beats (-1 to keep as-is)
Quantize Cues
Quantizes cue points to the beatgrid. Quantizing means that cues that are not exactly on the beatgrid will be moved to the nearest beat marker. This only works if a track has been analyzed with a beatgrid.
- Beats: 1 beat, 2 beats, 4 beats (1 bar), 16 beats (4 bars), 64 beats (16 bars)
Half/Double BPM
Halves or doubles the BPM of the track and the beatgrid markers.
- Options: Half, Double
Shift Cues/Beatgrid
Moves all cues and beatgrid markers by a specific amount of milliseconds.
- Shift cue points: Yes/No
- Shift beatgrid: Yes/No
- Amount (ms): Number of milliseconds to shift
Sort Cues
Sorts your cues chronologically or by other methods.
- Sort methods: Time (increasing), Time (decreasing), Label (A-Z), Label (Z-A), Label (Empty first), Label (Empty last), Cues first then loops, Loops first then cues
Replace Cue Text
Replaces text in all cue names with new text.
- Text to replace: Text to find
- New text: Replacement text
- Case insensitive: Yes/No
Remove Cue Text
Removes text from all cues.
Remove Cues by Label
Removes cues whose label contains the specified text (case-insensitive).
- Label contains: Text to match
Beatgrid Recipes
Delete Beatgrid
Deletes all beatgrid markers from the selected tracks.
Round BPM
Rounds the BPM of the track and all beatgrid markers to the nearest full number. You can use this if you're very sure that the BPM of the selected tracks are a full number (e.g. Electronic music).
Quantize Beatgrid
Moves the first beatgrid marker to the first cue point. Does nothing if track has no cue points.
Field Recipes
Copy Field
Copies a source field into a target field, overwriting the target field and leaving the source field intact.
- From: Source field
- To: Target field
Move Field
Moves a source field into a target field, overwriting the target field and deleting the source field.
- From: Source field
- To: Target field
Merge Fields
Merges two source fields into a target field, overwriting the target field. Leaves the source fields intact. You can add a separator between the two fields.
- Field 1: First source field
- Field 2: Second source field
- Target Field: Destination field
- Separator: Text between the two values
Prefix Field
Adds a prefix to a field.
- Field: Field to prefix
- Text: Text to add before
Suffix Field
Adds a suffix to a field.
- Field: Field to suffix
- Text: Text to add after
Swap Fields
Swaps the text in two chosen fields.
- Field 1: First field
- Field 2: Second field
Split Field
Splits a source field on a given text and copies the two results into two target fields, overwriting the target fields.
Example: Source: "Get Lucky - Daft Punk", split on " - " will result in the two target fields getting "Get Lucky" and "Daft Punk".
You can preserve the split text so it won't get deleted. In the above example, this would result in "Get Lucky - ".
See this example.
- Source field: Field to split
- Text to split on: Delimiter text
- Preserve split text: Keep the delimiter in output
- First target field: Destination for first part
- Second target field: Destination for second part
- Append text: Add to end of target field instead of overwriting
Text Recipes
Remove Text
Removes any occurrence of the given text from the chosen field.
- Text to remove: Text to find and delete
- Field: Field to modify
- Case insensitive: Yes/No
Replace Text
Replaces any occurrence of the given text in a field with a new text.
- Text to replace: Text to find
- New text: Replacement text
- Field: Field to modify
- Case insensitive: Yes/No
Change Extension
Changes the extension where Lexicon looks for your tracks. Use this if you changed your audio files to a different file type.
Extract Text
Finds text between given characters and sends it to a field of your choice.
- Source field: Field to extract from
- Search characters before: Starting delimiter
- Search characters after: Ending delimiter
- Include search characters: Keep delimiters in extracted text
- Delete matched text: Remove matched text from source
- Target field: Destination for extracted text
- Append: Add to target instead of overwriting
Shorten Text
Creates an abbreviated version of the text in a field, giving each word a maximum length. The result will be copied into the target field, overwriting the target field and leaving the source field intact.
Example: "Get Lucky" with 2 characters will turn into "GeLu".
- Field: Source field
- Target field: Destination field
- Characters per word: Number of characters to keep from each word
Remove Special Characters
Removes or replaces special characters in a field. Choose a mode:
Special characters: converts currency symbols ($→S, @→A, €/£→E, ¥→Y), trademark/legal symbols (®→(R), ™→(tm), ©→(c)), normalizes mathematical and full-width alphanumerics to plain ASCII, strips zero-width characters, and removes diacritics from accented letters.
Emojis: removes emojis and emoji modifiers (skin tones, variation selectors, ZWJ sequences).
Field: Field to process
Mode: Special characters / Emojis
Remove Between
Removes text found between a chosen pair of brackets or quotes, including the brackets/quotes themselves. For example, removing between parentheses turns "Get Lucky (Radio Edit)" into "Get Lucky".
- Field: Field to modify
- Brackets or quotes: ( ) parentheses, [ ] brackets, { } braces, < > angle brackets, " " double quotes, ' ' single quotes
Number Recipes
Increase/Decrease Number
Increases or decreases a number by the given amount.
- Field: Number field to modify
- Amount: Value to add (use negative to decrease)
Tag Recipes
Import Tags from Text
If you use text tags with the hashtag system, you can convert them into Lexicon tags here. The hashtag system are text values like "#Techno #Vocals". You can safely run this multiple times. Existing custom tags are preserved.
- From: Source text field (default: Comment)
- Separator: Character that marks tags (default: #)
Add Tags
Adds the chosen tags to your selected tracks.
- Tag to add: Tag(s) to add
Remove Tags
Removes the chosen tags from your selected tracks.
- Tag to remove: Tag(s) to remove
Replace Tag
Replaces the chosen tag with a different tag, if it is present on your selected tracks.
- Old tag: Tag to find
- New tag: Replacement tag
Clear Tags
Removes all custom tags from the selected tracks.
Other Recipes
Mark as Incoming
Puts the selected tracks back into the Incoming page. You can then process them from there again. This is useful if you want to put messy tracks into the Incoming page as a todo-list or if you want to auto-move them to a different location.
You can also do this by right clicking your tracks, Send to ➡ Incoming.
Remove from All Playlists
Removes the selected tracks from any playlist that it occurs in. Does not remove tracks from smartlists.
Import Date from Filesystem
Takes the creation date of your music files and imports them into your tracks.
Track Discovery
Track Discovery
You can find Track Discovery by right clicking tracks ➡ Track tools ➡ Discover new tracks
With Track Discovery you can easily find new track recommendations you'll like that you don't have in your library yet.
Just select a playlist and Lexicon will give you a long list of tracks that are similar. These tracks are checked before showing them to you so you'll only see tracks that you don't have yet.
Notes
Lexicon will do its best to filter out tracks that you already have. This works best if your track titles are as clean as possible. Use Smart Fixes to clean them.
The amount of results may vary. If you give Lexicon a playlist with very few tracks then it may not find many new track recommendations for you. Try to use a playlist that has as many tracks as possible that are similar, so usually the same genre. Large playlists will give different results every time. You can run the same playlist multiple times for new recommendations.
Track Matcher
Track Matcher
You can find the Track Matcher in the left sidebar menu
The Track Matcher is a powerful tool for DJs who get lists of tracks they should play. This is really useful for wedding and event DJs.
With the Track Matcher, you upload or paste a text file and Lexicon will go through your entire library and find close matches. The results can be saved to a new playlist.
Preparation
The Track Matcher compares the artist and title fields in the list you upload with the artist and titles of the tracks in your library. Consider using Smart Fixes to clean your tracks so the results are as good as possible. One important Smart Fix is Extract Artist From Title, because if your tracks don't have an artist field, then nothing can be matched there.
Sources
The Track Matcher can read from the following sources:
- Text files
- CSV (comma separated) files
- Spotify playlists
- Beatport playlists
- Tidal playlists
- Apple Music playlists
- SoundCloud playlists
- YouTube playlists
Input
The text you upload does not need to be exact. Lexicon uses fuzzy searching which means it will even find results if your text has typos or edits and remixes. You can enable strict search so it only finds exact matches. Disable strict search to get more results.
This does mean your results may contain tracks that are very similar to the tracks you wanted. That's why it's a good idea to quickly go through the results and see if there are any tracks you really don't want to add.
Cleaning
The input text gets cleaned automatically, so don't worry about any extra spaces, dots, or other non-text characters.
File type
You can load .txt or .m3u8 files into the Track Matcher. You can select the separator you want to use, usually this is something like -. You should have one artist/title combination per line.
Apple Music (iTunes) can export playlists as M3U8 file that you can use here. To do this in Apple Music, select a playlist and go to File ➡ Library ➡ Export Playlist and choose M3U8 as file type.
Swap artist & title
This option is useful if you entered the artist and title in the reverse order. Sometimes you copy paste a list of tracks and the list had the artists and titles reversed, enable this to correct that. You will see how it looks in the next screen.
Separator
There are two special ways to use the separator character.
If a line does not have a title but does have a separator and an artist name (eg - Daft Punk) then the Track Matcher will show you all tracks from this artist.
Or if a line does not contain the separator character, then the Track Matcher will show you all tracks with titles that match this line. So without separator character, it is assumed there is no artist on this line.
Not found
Results that are not found can be send back to a streaming service as a new playlist. This supports Spotify, Tidal and Beatport.
Playlist
The new playlist is saved in the special Lexicon playlist folder. You can find it at the bottom of your playlists.
Example
Here is an example of what the text input could look like:
Flight Facilities – All your love Steelers Wheel – Stuck in the middle with you Fleetwood Mac – The Chain Ziggy Albert – Days in the sun Mallrat – UFO Set Mo – White Dress Rex Orange Country – Loving is Easy Flight Facilities – Crave You Van Morrison – Brown Eyed Girl; Ray LaMontagne – You are the best thing Big Yellow Taxi Elton John –
Undo History
Undo History
Lexicon allows you to undo changes, but it doesn't work like a traditional CTRL-Z that you might be used to.
Undo events are available for 60 minutes or until you restart Lexicon.
Events
Undo History works on specific events, so it may not be available everywhere. You are able to undo things like smart fixes, playlist deletes, track deletes and edits.
Order
When you want to undo multiple events, keep in mind that the order may be important when the events are related to each other.
An undo event might be a deleted playlist and Lexicon can restore it. But if the tracks inside that playlist have been deleted from Lexicon then they need to be restored first. In such a scenario, make sure to undo the track deletion first and then the playlist deletion.
Backups
Undo history is great to restore mistakes, but they are no replacement for a good backup strategy. Daily backups can save you a lot of work! See Database Backups for more information.
Watch Folder & Incoming Tracks
Watch Folder
Lexicon has a watch folder. This folder is constantly being watched by Lexicon and any music file added to it will automatically be imported into Lexicon.
The default watch folder is Music/Lexicon/Watch Folder
Incoming Tracks
Tracks that are imported from the watch folder are called incoming tracks and you can find these in your Incoming page (Sidebar ➡ Tracks ➡ Incoming). This page gives you a great opportunity to process incoming tracks. For example, you can clean up tags, add cue points or add them to one or more playlists.
When you are done processing one or more tracks, you can select them and press Selected done. Or set the entire list as done by clicking All done.
Deleting
You can delete tracks from the incoming list by selecting them and choosing Delete selected. This will delete the selected tracks from your library and from your computer.
Workflow
When you press the Selected done button, Lexicon will automatically load the next track in the list and select it. You can bind this button to a hotkey in the settings. This will let you speed up the process with the right hotkeys.
Auto Move & Rename files
Any incoming track can automatically be moved to a destination of your choice. The move is performed when the track is marked as done.
Moving only happens if a target folder is set in the settings. If no target folder is set, track will not be moved and will stay in your watch folder. You can still rename files without moving them.
You can let Lexicon automatically create a subfolder inside your target folder based on the "pattern". This pattern can be changed in the settings on the Incoming page. There are three patterns that decide the name of the first, second and third subfolder. All three are optional.
Example: If you choose Genre as the first pattern, your tracks are going to be moved in subfolders with the name that is taken from the genre field from that track. It will look like this:
C:/Users/Christiaan/Music/House/track.mp3. If your second pattern is BPM it would look something likeC:/Users/Christiaan/Music/House/128/track.mp3
Most patterns work the same here with the exception of First tag. With the first tag pattern, the first tag that is in your first tag category is used as subfolder. You can change the category order on the Tags page. Whichever category is first, that is the category that is used.
If a field is empty, then the track will still be moved to the target folder but without extra subfolder.
File Rename Pattern
Lexicon can also change the filename of tracks automatically. To do this, you have to set up a filename pattern. If you only want to rename your files without moving them, simply don't set any target folder.
You can create a pattern by using field names surrounded by %, e.g. %artist%. You can combine these with normal text to create a pattern, e.g. %artist% - %title%. This would result in Daft Punk - Get Lucky.
You can choose from the following fields: artist, title, albumTitle, label, remixer, mix, composer, producer, grouping, lyricist, comment, key, genre, bpm, rating, color, year, durationSeconds, bitrate, playCount, sizeBytes, sampleRate, trackNumber, energy, danceability, popularity, extra1, extra2
You can also surround a field name with curly bracket { } to make it optional. When a field is optional, anything within the curly brackets is only added to the filename if the field value exists. For example, a pattern of %artist% - %title% (%key%) on a track without a key would normally end up as Daft Punk - Get Lucky (). By adding curly brackets, e.g. %artist% - %title% {(%key%)} a track without key would be Daft Punk - Get Lucky.
Here are some basic pattern examples to get started:
| Pattern | Result | Explanation |
|---|---|---|
%artist% - %title% |
Daft Punk - Get Lucky | The two tags are replaced by the artist and title tags found in Lexicon |
%artist% - %title% {(%key%)} |
Daft Punk - Get Lucky (12M) | The key and parenthesis are only added if the track has a key. If not, the parenthesis will not be added either |
%artist% - %title% {%key%}{|%bpm%} |
Daft Punk - Get Lucky 12M|128 | The key and BPM are only added if the track has them. |
{%genre% -} %artist% - %title% |
Pop - Daft Punk - Get Lucky | Genre is added at the start of the filename, if there is a genre. |
(Favorites) %artist% - %title% |
(Favorites) Daft Punk - Get Lucky | A static text is added at the start of the filename. This is not based on a variable so it will not change. |
Special Patterns
There are a few special patterns.
Bitrate (higher/lower 320kbps)
Bitrate is sorted in two possible folders:
320+ for all tracks that have a bitrate of 320 and higher.
320- for all tracks that have a bitrate lower than 320.
First tag
Uses the first tag on that track from the first tag category. You can which tag category is used here by making sure the category you want is the first visible one on the Tags page.
Current year
Uses the current year.
Current month
Uses the current month as a number with a zero padded on the left, e.g. 01 up to 12
Current decade
Uses the current decade, this will show as year ranges in the form of 1990 - 1999.
Write Tags (ID3)
Write Tags (ID3)
You can write tags to file by right clicking tracks ➡ Write tags
With the Tag Writer you can update your music file tags (ID3 tags) so they are identical to your Lexicon database.
Your tracks will already look good in your Rekordbox, Serato, Traktor, VirtualDJ or Engine DJ after syncing but if you use your music files in another program (e.g. a music player) then you can mirror the changes with the Tag Writer.
You can select any field you want to write or skip. So if you just want to update your track titles but leave the rest as-is, you can do that too.
Other Tools
Playlist Occurrence
You can find Playlist Occurrence in the top menu bar in Utility ➡ Other
With this utility tool you can determine which tracks occur this many times in any playlist.
For example, by setting the amount to 0, you will get a list of all tracks that don't occur in any playlist. Or if you set it to 2, you would get a list of tracks that occur in exactly 2 playlists.
Beatshift
The Beatshift Correction scan happens automatically during import and sync
Converting your library causes cue points and beatgrids to shift on some files that are encoded in a certain way. Every DJ software treats these uncommon files differently. This problem looks something like the below waveform.
This problem may occur after importing from a DJ app or when converting to a DJ app.
Your tracks are automatically corrected if this problem is detected. If you still encounter this in any of your tracks, they are most likely missed by the scan. The Beatshift Fixer can help there.
Beatshift Fixer
Sometimes you may encounter tracks that are not properly corrected and you still notice a shift after import or syncing. Sadly, these tracks are not detected by the scanner so there is no automatic correction for them. The way to solve it for these (or any MP3, MP4 or M4A) files is to use the Beatshift Fixer utility.
You'll find the Beatshift Fixer in the top menu bar under Utility
The Beatshift Fixer will re-encode your MP3, MP4 and M4A files so they are no longer affected by the beatshift problem.
Lexicon will know when your tracks have already been re-encoded by the Beatshift Fixer, so you can safely re-run the utility. Lexicon won't do the same work twice.
Existing tracks with cues and beatgrids
When you run the Beatshift Fixer on tracks that already have cues and beatgrids, those cues and beatgrids will be what you see in your DJ apps as well. So if you had tracks that weren't quite right yet after importing, you can fix them in Lexicon. From that point on, they should always be good.
Another trick in Lexicon is to re-analyze your tracks (that will overwrite your beatgrids) and then run the Quantize Cues recipe. This will give your tracks a new beatgrid and the quantize recipe will put your cues exactly on the grid.
New tracks & automatic fixing
The Beatshift Fixer has a global option to always re-encode newly added MP3, MP4 or M4A files. This is the easiest way to use this utility as it will be fully automatic when you drag tracks into Lexicon or when they are added with the Watch Folder. When you start adding cues or beatgrids, the tracks will already be re-encoded so there is no chance of a shift occurring.
Transfer Streaming To Local
You can find this utility in the top menu bar under Utility
With this utility you can replace your streaming tracks with their local file counterpart. This keeps your playlists intact and your local tracks will get the beatgrids and cues from the streaming tracks.
This currently works with Beatport LINK and Beatsource LINK.
Usage
Usage is very simple. Your library needs to include streaming tracks and you need to have purchased the streaming tracks as MP3, WAV or AIFF file.
It's important that the purchased tracks are not in Lexicon. If you added them to your library, then Lexicon will not be able to automatically find them. In that case, simply delete them from Lexicon first.
Open the utility and point it at the folder that contains your purchased tracks. Lexicon will find them automatically and replace your streaming tracks with the local tracks.
Relocate single streaming track
You can right click any streaming track and use the Relocate option to change it to a file on your hard drive. Since this can be any file, there is no guarantee that your cue points will be an exact match.
Troubleshooting
Streaming track not replaced
If a streaming track is not replaced but you do have the local track, one of the following things could be happening:
The local track is already in Lexicon
Remove it from Lexicon and run the utility again
The local track is a different version
A track can have the same artist and title but still be a different track. This happens if you purchased a different version of the track or if the store deleted the track and replaced it with a different version. There is no automatic fix for it. Purchase the correct version if possible (right click a streaming track to open the store page for the correct version) and run the utility again.
If the original version no longer exists or can't be purchased, you will have to replace the track manually.
The local track is missing required ID3 tags
Matching is based on the information in the ID3 tags (specifically, the unique identifier tag). If this tag is not available, then it can't be matched. Make sure to leave the original ID3 tags in place.
Cues are shifted
Shifting cues is a problem that is not yet 100% solved. If you notice this, please contact support (Discord works best).
Stream Deck
Lexicon has an official Stream Deck plugin. You can download it here.
With this plugin, you can run any action that you can assign a keyboard shortcut to.
Examples of what you can do:
- Add certain tags to selected tracks
- Add selected tracks to one of your favorite playlists
- Set star rating or color on selected tracks
- Navigate through the Lexicon sidebar
- Jump to a cue
- Beat jump forward or backward
And much more.
Import Tags From CSV
You can find Import Tags From CSV in the top menu bar under Utility
Sometimes you want to import data from external sources that are not directly supported by Lexicon. An easy way to do this is by turning that data into a CSV file.
Lexicon will match your CSV file rows by the Location column or the Artist and Title combination. One of those is required in your CSV file. See below for an example CSV file. The Location column must contain the full track location. This is what Lexicon uses to find what track it is supposed to update.
Fields
You can import the following fields, the CSV column headers must be exactly one of these (case insensitive):
Title
Artist
AlbumTitle
Label
Remixer
Mix
Composer
Producer
Grouping
Lyricist
Comment
Key
Genre
Rating
Year
PlayCount
TrackNumber
Energy
Danceability
Popularity
Happiness
Extra1
Extra2
The fields Rating, Year, TrackNumber, Energy, Danceability, Popularity, Happiness are numbers. If a non-number value is found, it will be turned into zero.
Excel
Excel files are not directly supported, but Excel and any other similar program can save your sheets as CSV file.
Report
A report is created in your Documents/Lexicon/Reports folder.
CSV Examples
Match by location:
location,title,energy
/Users/Chris/Music/my-file.mp3,Get Lucky,5
Match by artist & title:
title,artist,energy
Get Lucky,Daft Punk,5
Smartlist Generator
You can find the Smartlist Generator in the top menu bar under Utility
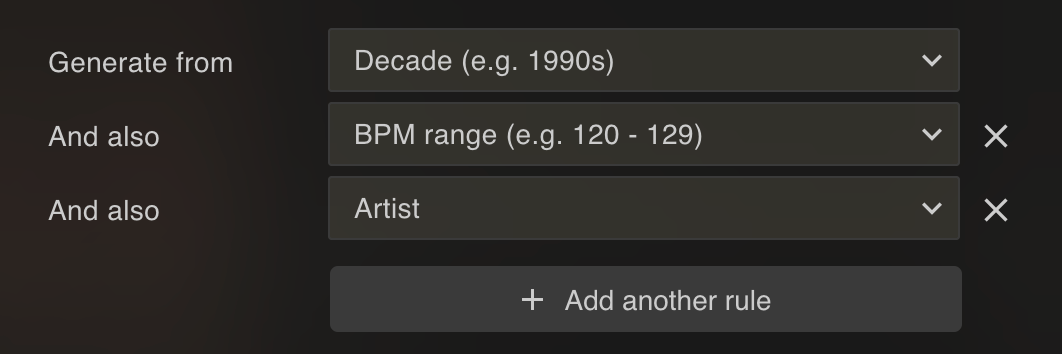
You can generate smartlists in bulk using the Smartlist Generator. This can be based on any of your track fields, custom tag categories or several special rules like Decade, BPM range or play count.
You will find the generated smartlists in the special Lexicon playlist folder.
The Smartlist Generator is safe to re-run, it won't double your already generated smartlists if they are still inside the special Lexicon folder. If you move them out of there, then it will generate the same smartlists in that folder.
Advanced
Local Path Mappings
You can find the Local Path Mappings in the Lexicon settings under Advanced.
Local Path Mappings is an advanced feature that helps you use the same Lexicon database on multiple computers, even if you use both Windows and macOS.
When you create a Lexicon backup and restore it on a different computer, most likely your music will not be found anymore. Maybe you use an external drive for your music or a Dropbox/Drive folder, but chances are there is a difference in the folder structure. With a path mapping, you can tell your secondary Lexicon where to look for your music without having to relocate your tracks.
Procedure
This feature does not automatically sync multiple Lexicons. You still have to back up and restore your Lexicon database manually. If you are on the Ultimate plan, you can very easily do this through Cloud Database Backup.
Restoring a Lexicon database overwrites your current database, so be careful. It is not possible to merge changes from multiple Lexicons into one. That's why you should always only make changes on one of your Lexicons. After making changes, make a backup and restore it on any other Lexicon that you want to use then.
Primary Lexicon
To use path mappings, you have to designate one of your Lexicon installations as the primary Lexicon. This is your main Lexicon. The folder structures of the primary Lexicon will be saved to your database, even when you save tracks on a secondary Lexicon.
You can have as many secondary Lexicons as you want. Path mappings are local to that Lexicon installation.
You should not set up any path mappings on the primary Lexicon.
Link
A path mapping is a link between two different folder paths. One of these folders is a "remote" path and the other is a "local" path. The remote path exists in your first (primary) Lexicon. The local path exists in your second/third/etc (secondary) Lexicon.
A remote path (primary Lexicon) might be D:/Music/ and a local path (secondary Lexicon) might be G:/Music/. With this path mapping set up, your secondary Lexicon will automatically look for your tracks on G:/Music/ instead of D:/Music/.
See below for more examples.
Adding Music
When you add music to the secondary Lexicon and the music comes from a folder that is affected by a path mapping, Lexicon will save the track as the remote path. So even though you're adding music from the secondary Lexicon, your database will still contain track locations that belong to your primary Lexicon. So if you ever stop using Local Path Mappings and continue on only the primary Lexicon, everything will still work.
Examples
This is a complex feature, so here are a few explained examples to help you understand.
Two Windows PC's with one external drive
Your primary Lexicon is a Windows PC and has music on an external drive at D:/Music/.
Your secondary Lexicon is a Windows PC and has the same external drive at G:/Music/.
When you restore your Lexicon database on the secondary Lexicon, your tracks won't be found because Lexicon still looks at D:/Music/.
Now add the following path mapping:
Remote D:/Music/ ➡ Local G:/Music/.
Lexicon will be able to find your music because it now knows that its D: tracks are actually on the G: drive.
Apple MacBook and a Windows PC with Dropbox
Your primary Lexicon is a MacBook and has music on Dropbox at /Users/chris/Dropbox/Music/.
Your secondary Lexicon is a Windows PC and has music on the same Dropbox at D:/Dropbox/Music/.
We'll need the following path mapping:
Remote /Users/chris/Dropbox/Music/ ➡ Local D:/Dropbox/Music/
Now, Lexicon on your Windows PC will look for your tracks at D:/Dropbox/Music/.