This guide will teach you how to move your DJ library from one computer to another. Even if the other one is a Mac or Windows. This works in combination with any DJ app; Rekordbox, Serato, Traktor, Engine DJ and VirtualDJ.
You can apply what you learn here to use Lexicon on two (or more) computers, or simply move your DJ library to a different computer once. The idea is the same.
We are focusing on moving your tracks and then changing where Lexicon looks for those tracks. Once that is complete and we have confirmed in Lexicon that the results are correct, we can do a normal Sync to your favorite DJ app.
Step 1: Import your DJ library into Lexicon
Make sure your DJ app on your first computer is in working order and that all tracks be found. If you have an external drive, make sure it is plugged in.
On your first computer, start by importing your library into Lexicon.
You can do this in Lexicon by going to the Sync page and then choosing Import tracks and playlists.
You should see all your tracks and playlists, now you are ready for Step 2.
Step 2: Move your tracks
Now move (or copy) your tracks to the second computer. If your tracks are on the internal drive of your computer, copy the top most folder to an external drive or network drive. If your tracks are on an external drive, simply disconnect the drive and connect it to the second computer.
If you are moving your tracks from the internal drive to the internal drive of your second computer, try to put it in the exact same place. That will save us some work later. For example, if your music is in Documents/DJ Music then you should copy the DJ Music folder and put it in your Documents folder on your second computer.
Once your music is available on your second computer, proceed to Step 3.
Step 3: Backup and restore Lexicon
On your first computer, create a Lexicon database backup (top menu bar) and restore that backup on your second computer. Tip: this is much easier if you have Lexicon Ultimate since you can use Cloud Database Backup to upload and download to the cloud, very easily.
Now that you've restored the Lexicon backup on your second computer, you will notice that all your tracks are shown as missing (the orange triangle). Don't worry, that's normal.
Step 4: Relocate your tracks
You have your Lexicon library on your second computer and you have your tracks on the second computer. Now all we need to do is fix where Lexicon thinks the tracks are, since it still thinks they are on the first computer. This is the hardest step and you need to pay careful attention here. We are going to use the Find Lost Tracks utility to relocate our tracks.
There are multiple scenarios I will explain, you only need to follow one of these. Choose the one that best fits your situation.
Scenario: Moving from Windows to Windows
This is an easy fix. Most likely the drive letter of your external drive has changed. Maybe it was D: on your first computer but is now E: on your second computer.
There are two options here.
You can change the drive letter of your external drive, as described here. That is a good fix because now your music is in identical locations on both computers. So a future Lexicon backup restore on the second computer will immediately be correct and you won't need to relocate your tracks.
The second way is to use Find Lost Tracks. Open it from the Utility menu and enter D: on the left hand side and E: on the right hand side. Of course, make sure those drive letters match your situation.
The previews on the right should exist on your computer. Check that they do and confirm to relocate your tracks. Now if you close the popup, you should no longer see the orange triangles as Lexicon can now find your tracks. You can move on to Step 5, you don't need to follow the other scenarios.
Scenario: Moving from Mac to Mac
When you plug in your external drive in your second Mac, it will most likely already have the correct name. But sometimes it happens that it gets a different name or it gets (1) added to the end.
There are two options here.
You can change the drive name of your external drive, by opening Finder and right clicking your external drive and choosing Rename. Make sure you don't accidentally add a space at the end. This is a good fix because now your music is in identical locations on both Macs. So a future Lexicon backup restore on the second Mac will immediately be correct and you won't need to relocate your tracks.
The second way is to use Find Lost Tracks. Open it from the Utility menu and enter /My External Volume (1)/ on the left hand side and /My External Volume/ on the right hand side. Of course, make sure the drive name matches your actual external drive as you can see in Finder.
The previews on the right should exist on your computer. Check that they do and confirm to relocate your tracks. Now if you close the popup, you should no longer see the orange triangles as Lexicon can now find your tracks. You can move on to Step 5, you don't need to follow the other scenarios.
Scenario: Moving from Mac to Windows
Mac and Windows treat their external drives differently. Mac uses a drive name, such as My External Volume and windows uses a drive letter such as D:. We have to correct this with Find Lost Tracks.
Open Find Lost Tracks from the Utility menu. Enter /Volumes/My External Volume/ on the left hand side and D:/ on the right hand side. Of course, make sure the drive name and letter matches your actual external drive name and letter.
The previews on the right should exist on your computer. Check that they do and confirm to relocate your tracks. Now if you close the popup, you should no longer see the orange triangles as Lexicon can now find your tracks. You can move on to Step 5, you don't need to follow the other scenarios.
Scenario: Moving from Windows to Mac
Windows and Mac treat their external drives differently. Windows uses a drive letter such as D: and Mac uses a drive name, such as My External Volume. We have to correct this with Find Lost Tracks.
Open Find Lost Tracks from the Utility menu. Enter D:/ on the left hand side and /Volumes/My External Volume/ on the right hand side. Of course, make sure the drive name and letter matches your actual external drive name and letter.
The previews on the right should exist on your computer. Check that they do and confirm to relocate your tracks. Now if you close the popup, you should no longer see the orange triangles as Lexicon can now find your tracks. You can move on to Step 5, you don't need to follow the other scenarios.
Scenario: Moving from one internal drive to another internal drive
If you moved your tracks from the internal drive of your first computer to the internal drive of your second computer, you may need to use Find Lost Tracks to correct the track locations.
If you moved the folder that contains all your music to the exact same location on the second computer, you may already be done. If your username is identical on both computers then Lexicon should already find your tracks at this point.
If your username is different, you will need to use Find Lost Tracks to change that. You can check what your username is in the following ways:
On Windows:
There are several ways to find your username, you can see them here.
On Mac:
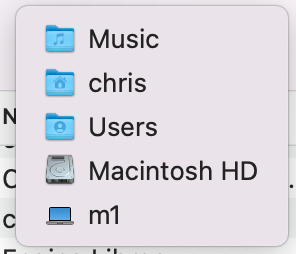
Open Finder and right click in the top of the window where it shows the folder name. You will see the full path and you can see your username here:
Now that you know your usernames, open Find Lost Tracks from the Utility menu. On the left enter the username of your first computer surrounded by two slashes, like so: /chris/ and on the right do the same for your second computer username, e.g. /christiaan/. This is the same method for both Windows and Mac.
If your tracks were copied to the same location on the second computer, Lexicon should now find your tracks and you can proceed to Step 5.
If your tracks were not copied to the same location then do the above again to fix any differences in the locations. If you made a mistake and you feel that it's hard to undo it, then don't be afraid to restore a Lexicon backup and start over.
Step 5: Sync to your favorite DJ app
We're almost done! The music is on your second computer, the Lexicon library is on your second computer and Lexicon should be finding all your tracks now.
The last step is syncing Lexicon to your DJ app and that is super easy.
Go to the Sync page in Lexicon and choose your DJ app. Make sure it is a Full Sync and press the start button.
When it is done, open your DJ app and all your tracks should be there. Happy mixing! 🎵
Bonus: Using Lexicon on two computers
This is some extra information for users who want to use Lexicon on two computers and switch between the two. The Lexicon feature that really improves this workflow on multiple computers is Local Path Mappings, more on that below.
First of, it is important to know that restoring a Lexicon backup completely overwrites your existing Lexicon library. This means that if you make changes on both computers at the same time, then restoring a backup on either computer will overwrite some of your work.
So it is super important that you only work on one Lexicon at a time. When you are done with your prep work, upload the database to the cloud (or get it to the other computer in another way) and restore it on the second computer. Then you can start your work there. This goes both ways.
Local Path Mappings
If you are using Lexicon on two computers with the same music files, you probably know that unless the location of your music files are 100% identical, it is very annoying to switch between computers. You would need to use the Find Lost Tracks utility every time you switch.
With Local Path Mappings, you don't need to use Find Lost Tracks anymore and everything is automatic.
With a Local Path Mapping you tell Lexicon to automatically look for your files in a different location.
For example, if your main Lexicon is on a MacBook, your file paths will look something like /Users/chris/Music/Daft Punk - Get Lucky.mp3. Of course, this file path won't work on Windows at all! So if your secondary Lexicon is on Windows, you would set up a local path mapping like /Users/chris/ -> C:/Users/Chris/ and now Lexicon will automatically look for your file at C:/Users/Chris/Music/Daft Punk - Get Lucky.mp3.
This lets you use your entire Lexicon library with the same music on different machines, even operating systems. Your changes are saved to the same databases that will be usable on every machine again!
For more Local Path Mapping info and examples, check out the manual.